Issues (Assets)
Last updated
Introduction:
The Issues tab in the BuiltSpace Admin Portal is a valuable tool designed to provide users with insights into their asset's work history. This feature allows users to view active and closed issues and tasks associated with any asset, enabling effective asset management and maintenance tracking. It helps you answer questions such as:
- What planned maintenance was done or skipped?
- What known issues are there?
Definitions
- Issues: These are work items related to a single asset that are not part of a visit and are not dispatched. They are typically concerns or problems associated with an asset that require attention but are not yet scheduled for resolution.
- Tasks: Visits are made up of tasks. They can either be added manually or become part of planned maintenance visits. This includes work items scheduled for action during a visit, whether they are maintenance tasks, inspections, or other activities. Issues transition into the "Tasks" category when they are actively being addressed during a visit.
Key Features of the Issues Tab:
- Visibility of Active/Closed Issues and Tasks:
- The Issues/Tasks tab grants users the ability to view both active and closed issues and tasks for any asset. This comprehensive view ensures that users stay informed about the asset's work history.
- Access to Photos/File Attachments:
- Users can conveniently access photos and file attachments associated with any task or issue. This feature aids in visualizing and documenting asset-related work.
- Filtering Capabilities:
- The tab offers powerful filtering options, allowing users to narrow down results by date range, status (active or all), or category. This flexibility simplifies data retrieval and analysis.
- Colour-Coded Status Values:
- Status values are colour-coded, enhancing visibility and quick identification. For example, high-priority tasks are highlighted in red, and overdue tasks are marked with a red title when their due date has passed.
- Work History for Customer Portal Users:
- Customers using the portal can access the asset's work history, gaining insights into past issues and tasks related to the asset. This transparency fosters better communication and understanding between service providers and customers.
Note:
The tab is designed to be an informational tool for users and will include features for editing, dispatching, and managing tasks/issues in future updates.
Service Request Form
The Service Request Form is a critical feature within the Admin Portal, designed to streamline the process of submitting and handling various service requests. This tool allows users to efficiently communicate their needs to the admin team, ensuring a quick and organized response.
Steps to Submit a Service Request:
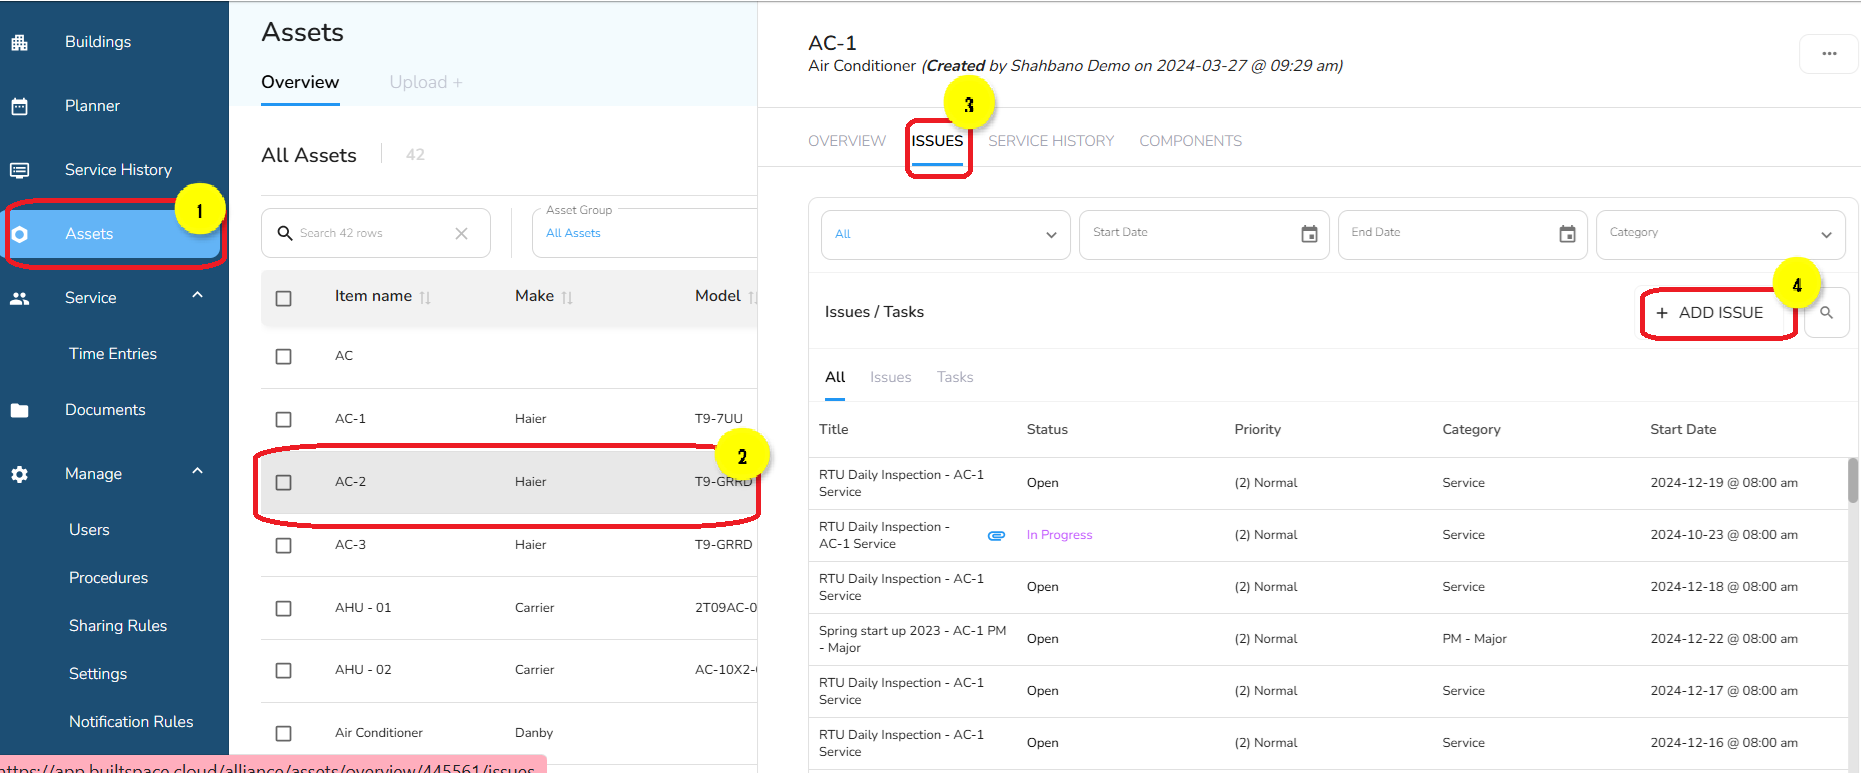
- Go to the Assets tab in the left navigation menu of the Admin Portal. The overview page will open.
- Find the specific asset for which you want to submit a service request. Click on the asset’s name to open its dashboard.
- Click on the Issues tab.
- On the Issues page, click on the "+Add Issue" button.
Features
Users can provide specific information related to their service request. The fields include:
- Details: Detailed description of the issue.
- Category: Area of Service Required.
- Priority Level: Button to indicate urgency.
- Attachments: Option to upload relevant documents or images.
Once all the required information is added, click SUBMIT to finalize your request.
Editing Issues
Editing an issue is crucial for maintaining accurate and up-to-date records of asset-related problems. This functionality ensures teams can effectively track, prioritize, and address issues as they evolve.
From the Assets tab, select the asset you want to edit.
There are two ways to view issues associated with an asset:
- From the Active Issues tab, or
- From the Issues tab.
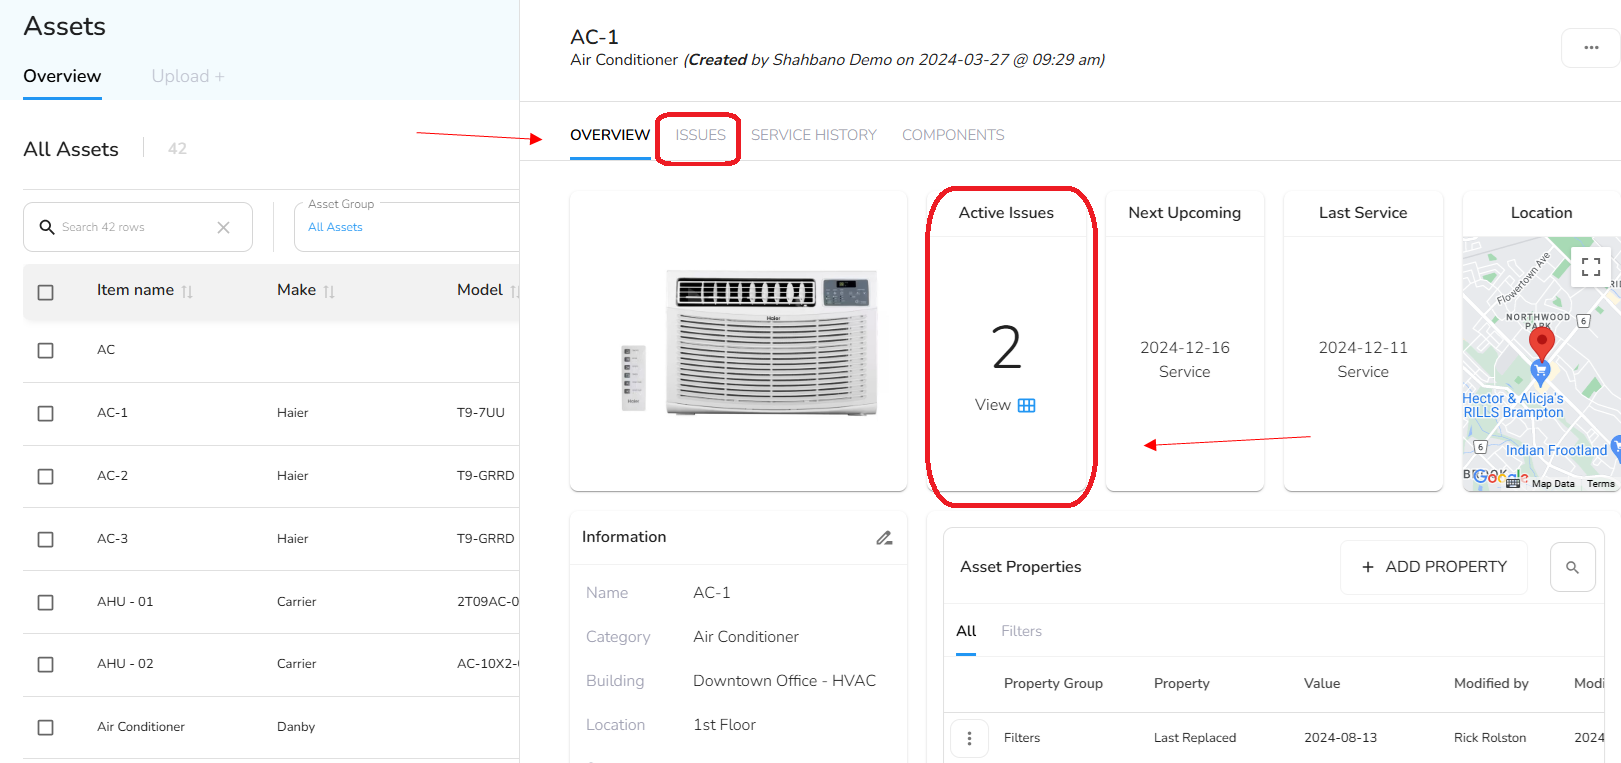
The Active Issues tab will only show active issues, while the Issues tab shows all issues.
- Click on the issue you want to modify. A slideout panel will appear, showing the issue’s details.
- Click the pencil icon located in the top-right corner of the slideout.
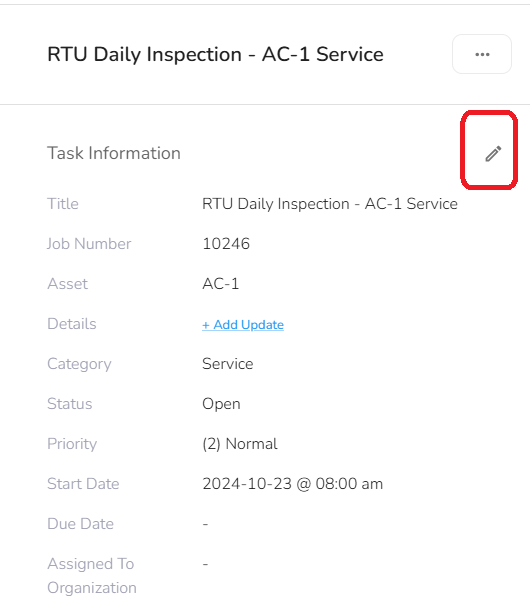
Click into the field you wish to update and make the desired changes.
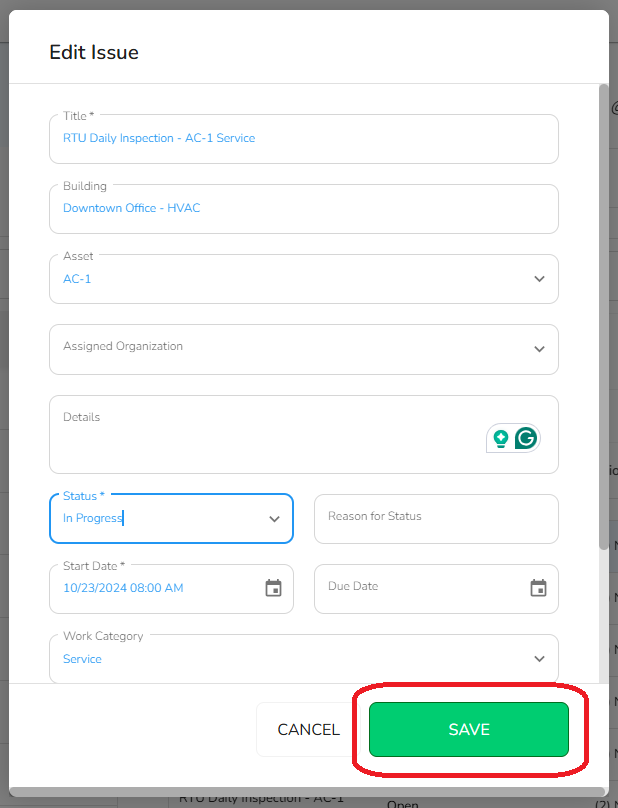
A new dialog will open showing all the fields in the issue. You can edit any field by clicking on it.
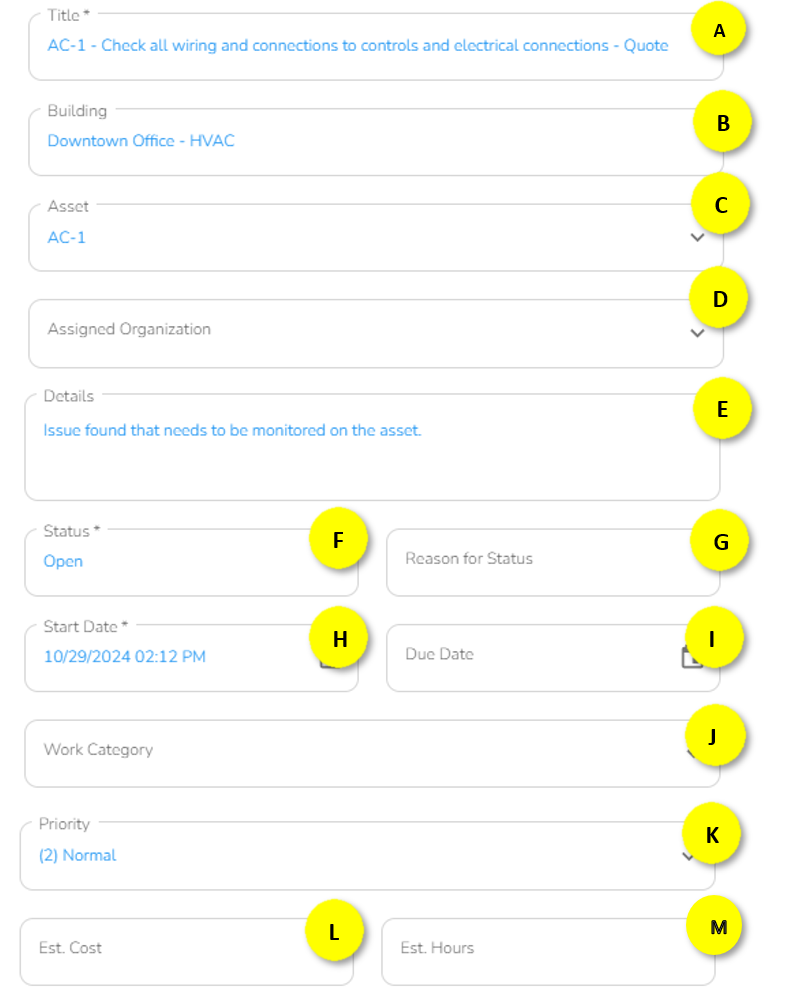
A - Title: This is the title of the issue.
B - Building: This is the building where the issue is located. This field is read-only. To move an issue to a different building, you must move the asset.
C - Asset: This is the asset the issue is associated with. This field is optional, but if you leave it blank, you cannot close the issue using the Service Twin® App. You must choose an asset to add the issue to a visit.
D - Assigned Organization: This is the organization the issue is associated with.
E - Details: This section is for a detailed description of the issue and any additional comments.
F - Status: This represents the status of the issue and can be:
- Open
- Needs Approval
- Approved
- In Progress
- Waiting
- Completed
- Closed
- Cancelled
[!NOTE]
Note:"Closed" and "Cancelled" are the only two inactive status options. If you want the issue to disappear from the app, choose one of these two options. All other statuses are considered active.
G - Reason for Status: Provides a reason for the status. This can be customized under Settings.
H - Start Date: This is the default value representing the date the issue was created; however, it can be edited.
I - Due Date: This is the date by which the issue must be resolved.
J - Work Category: This defines the type of work under which the issue falls. These will be preset, and you can choose from the available options.
K - Priority: This identifies the priority with which the issue needs to be addressed and will fall under one of three preset priorities:
- High
- Medium
- Low
L - Est. Cost: This is the estimated cost to resolve the issue.
M - Est. Hours: These are the estimated hours needed to resolve the issue.
[!NOTE]
Note:Estimated cost and hours can be used to help with work planning. The estimated cost and hours for a new visit are the sum of the cost and hours of the issues in that visit.
Once you've made all relevant updates the "Save" button at the bottom of the slide-out will become highlighted.
A pop-up confirmation will appear indicating that the changes have been saved successfully.
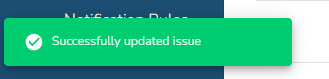
This confirms that your edits have been saved. To ensure the changes are reflected in the system, refresh your screen.