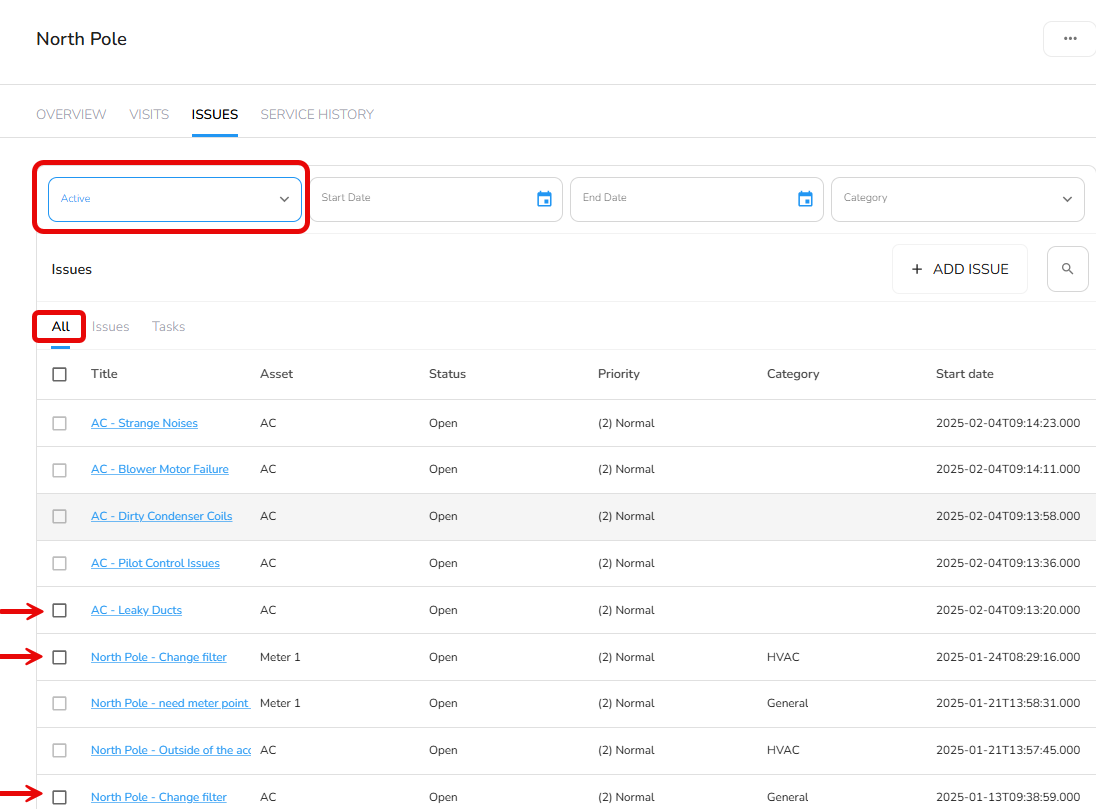
The Issues tab in the Building details is designed to provide users with insights into their building’s issues. This feature allows users to view active and closed issues in a building, enabling effective Asset management and maintenance tracking.
Key Features of the Issues Tab:
Visibility of Active/Closed Issues:
The Issues tab grants users the ability to view both active and closed issues. This comprehensive view ensures that users stay informed about the building’s work history.
Access to Photos/File Attachments:
Users can conveniently access photos and file attachments associated with any issue. This feature aids in visualizing and documenting asset-related work.
Filtering Capabilities:
The tab offers powerful filtering options, allowing users to narrow down results by date range, status (active or all), or category. This flexibility simplifies data retrieval and analysis.
Service Request Form
The Service Request Form is designed to streamline the process of submitting and handling various service requests. This tool allows users to efficiently communicate their needs to the admin team, ensuring a quick and organized response.
Steps to submit or update a service request:
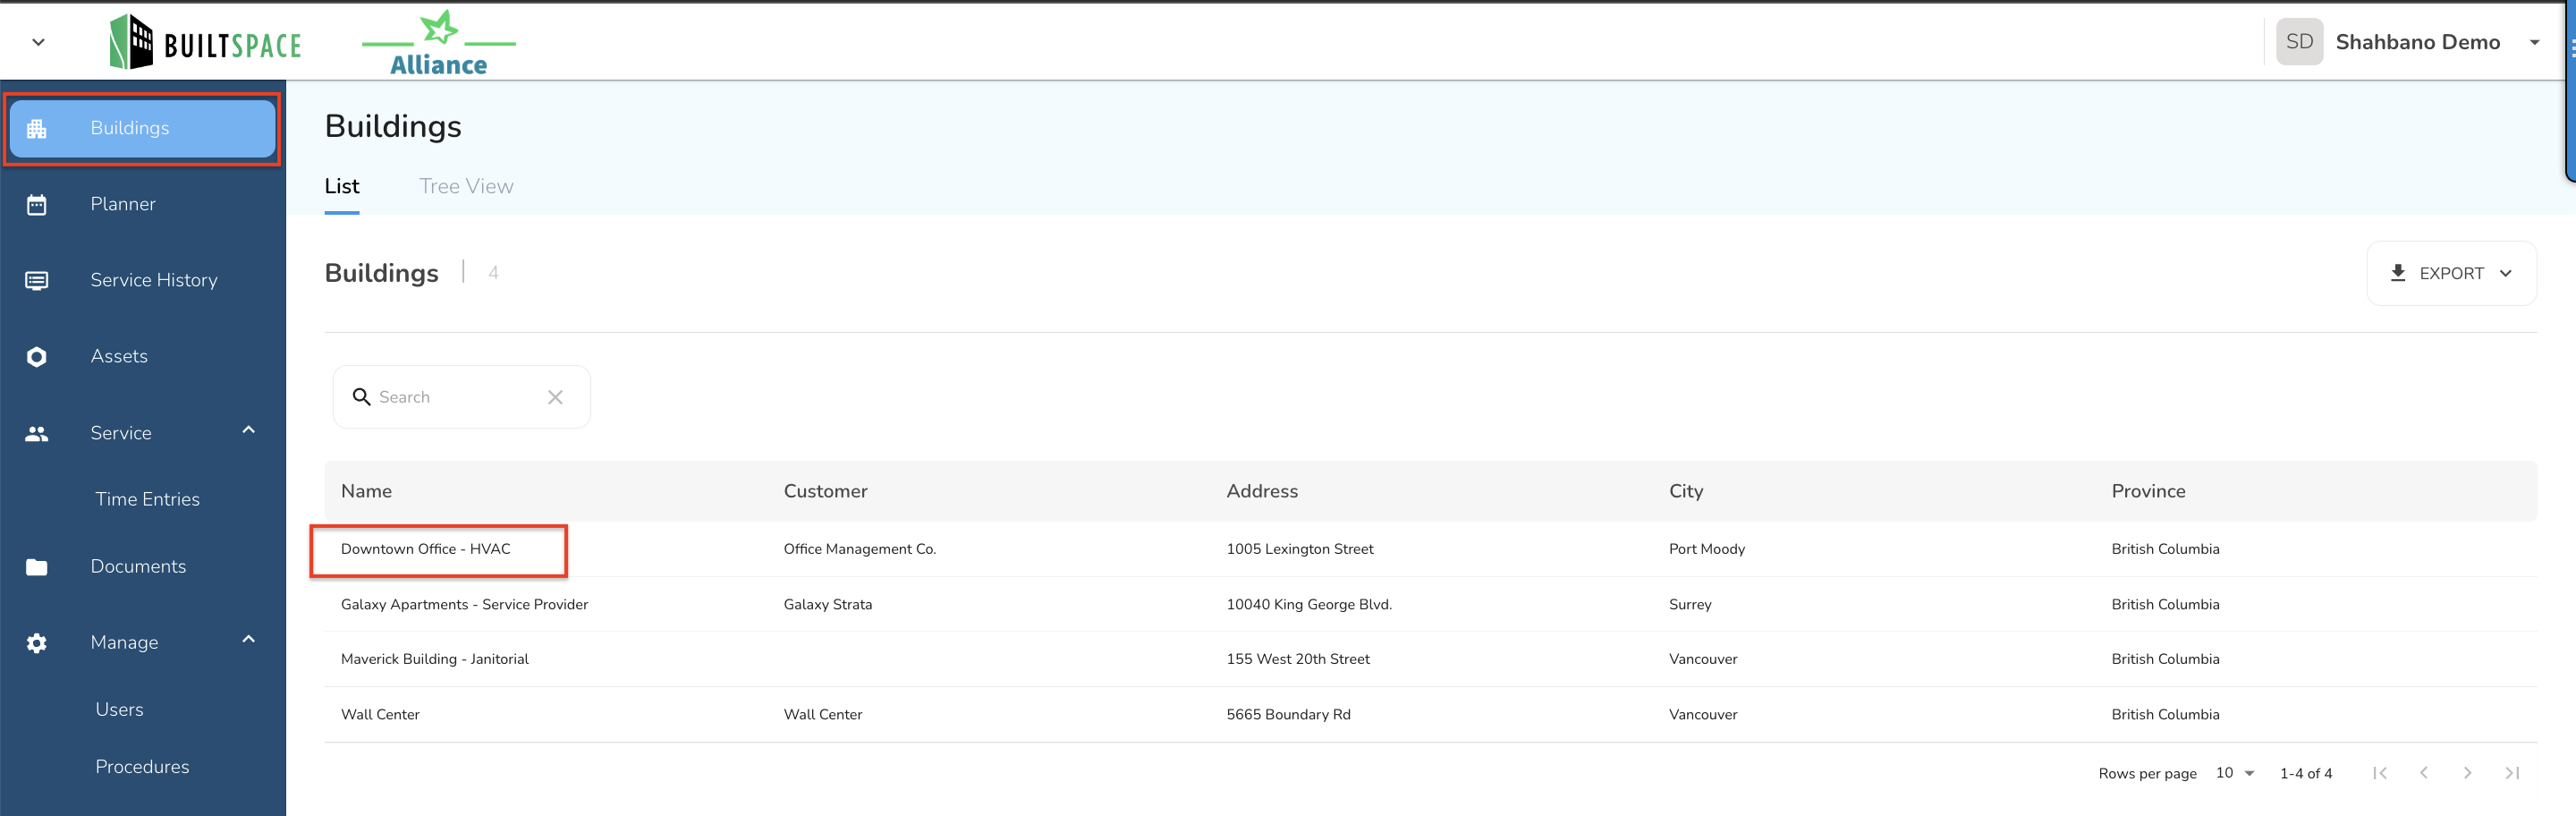
Go to the "Buildings" tab in the left navigation menu in the Admin Portal.
Find the specific building for which you want to submit a service request.
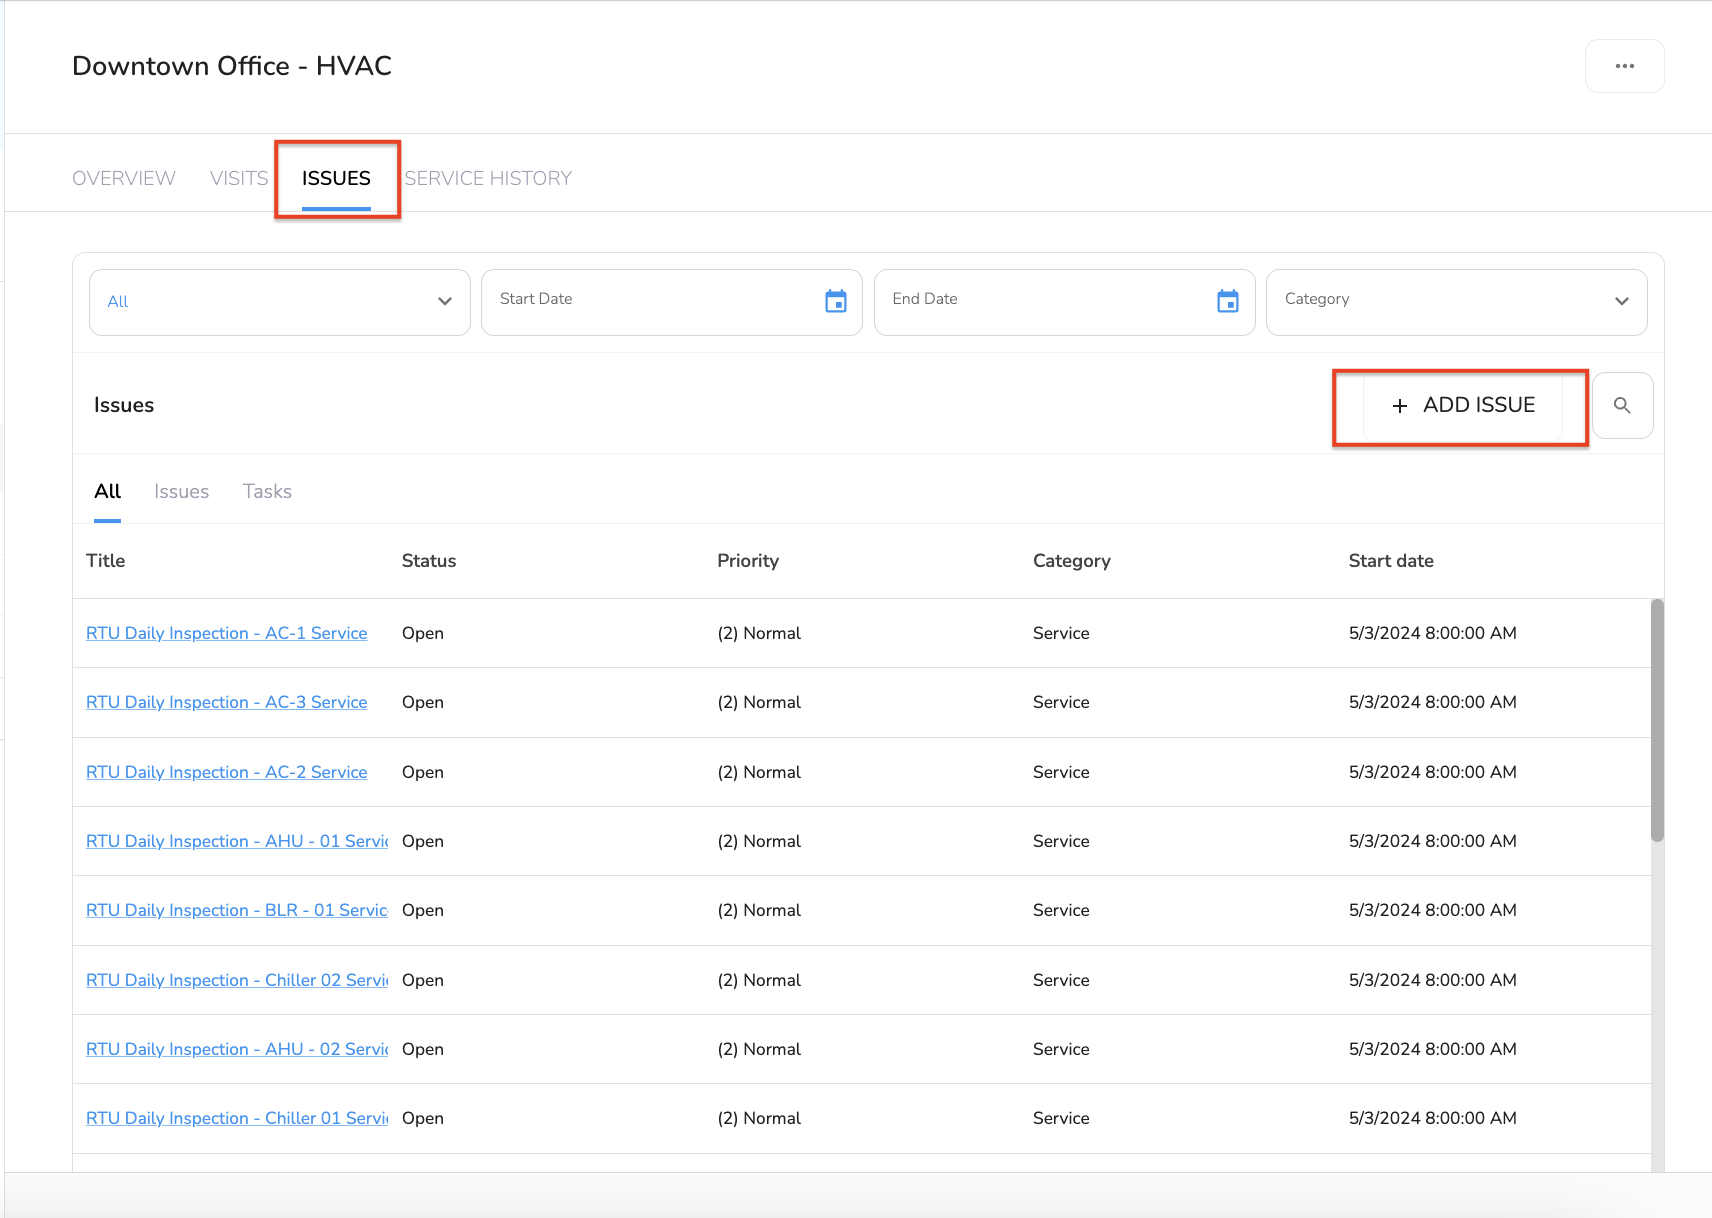
Click on the Issues tab to view all the Issues in the building.
To add a new service request, click on the +Add Issue button.
Features
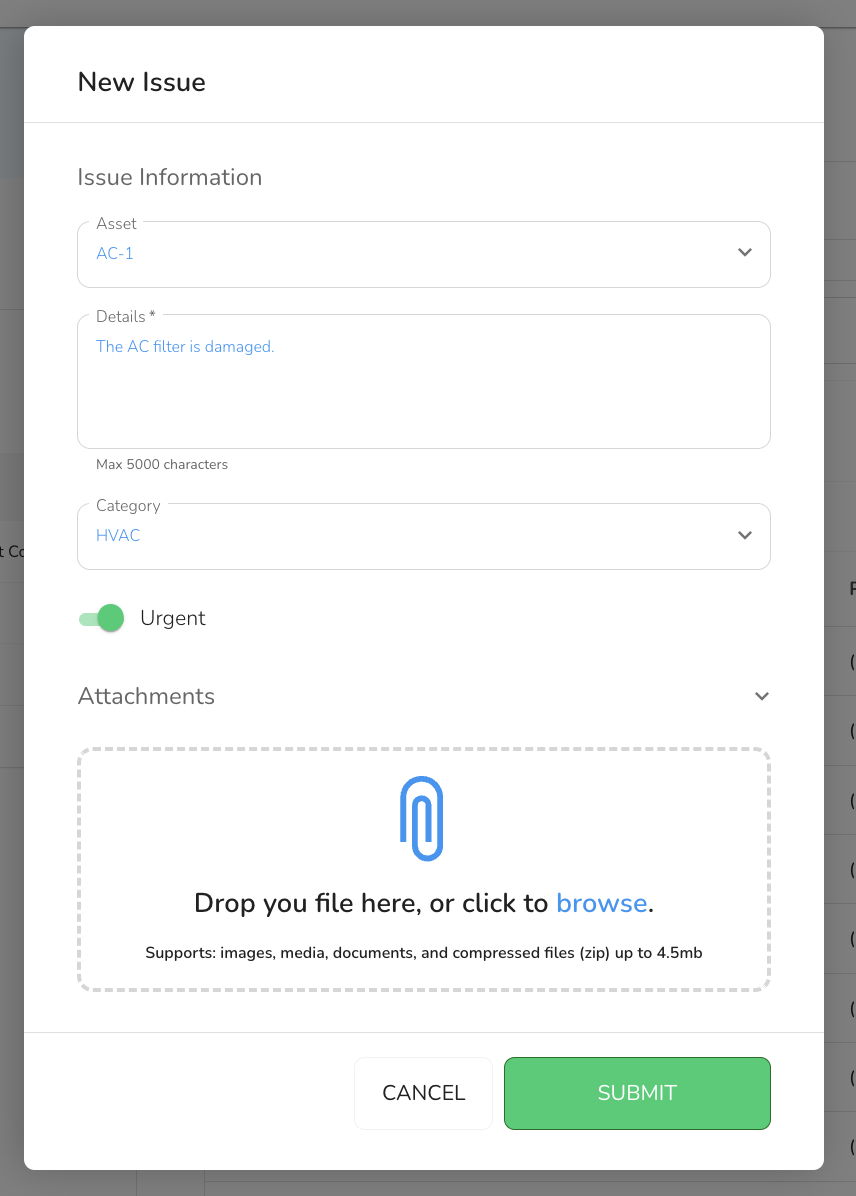
Users can fill in specific information pertinent to their service request. Fields include:
Asset: Select the asset/equipment that you are submitting the service request for.
Details: Detailed description of the issue.
Category: Area of Service Required in.
Priority Level: Button to indicate urgency.
Attachments: Option to upload relevant documents or images.
Once the information is added, Click "SUBMIT".
Editing / Updating Issues
Editing an issue ensures teams can effectively track, prioritize, and address issues as they evolve.
Steps to Edit Issues:
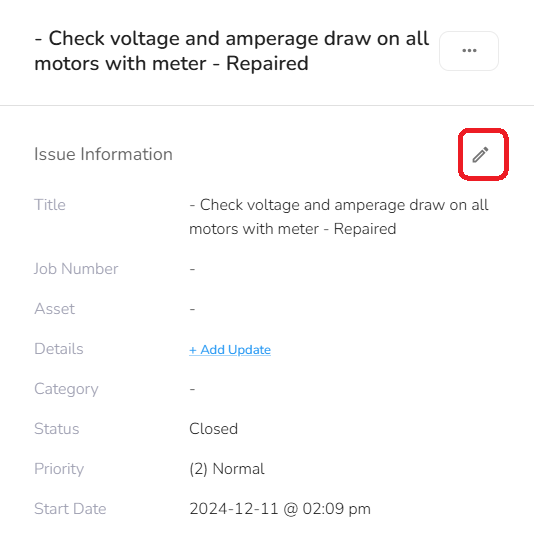
To begin editing an issue, look for the pencil icon under the Issues tab.
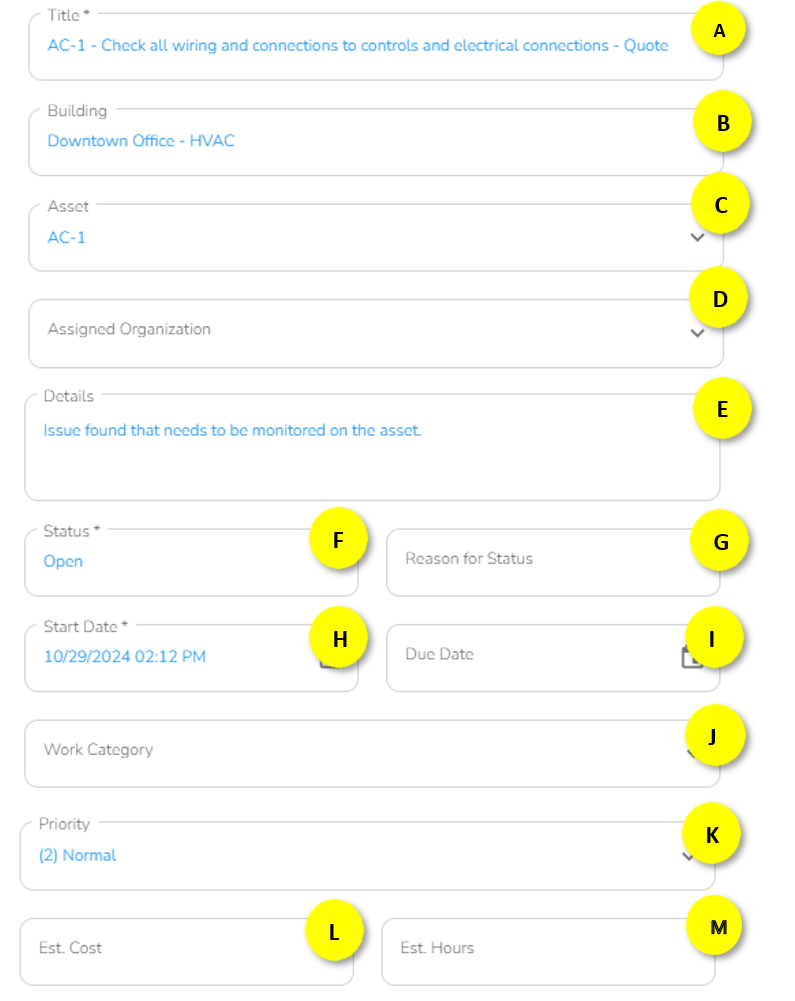
Click the pencil icon to open the Edit Issues slide-out panel. A new dialog will open, showing all the fields in the issue.
Field Descriptions:
A - Title
This is the title of the issue.
B - Building
This is the building where the issue is located. This field is read-only. To move an issue to a different building, you must move the asset.
C - Asset
This is the asset the issue is associated with. This field is optional, but if you leave it blank, you cannot close the issue using the Service Twin® App. You must choose an asset to add the issue to a visit.
D - Assigned Organization
This is the organization the issue is associated with.
E - Details
This section is for a detailed description of the issue and any additional comments.
F - Status
This represents the status of the issue and can be:
Open
Needs Approval
Approved
In Progress
Waiting
Completed
Closed
Cancelled
[!NOTE] Note:
"Closed" and "Cancelled" are the only two inactive status options. If you want the issue to disappear from the Service Twin® App , choose one of these two options. All other statuses are considered active.
G - Reason for Status
Provides a reason for the status. This can be customized under Settings.
H - Start Date
This is the default value representing the date the issue was created; however, it can be edited.
I - Due Date
This is the date by which the issue must be resolved.
J - Work Category
This defines the type of work under which the issue falls. These will be preset, and you can choose from the available options.
K - Priority
This identifies the priority with which the issue needs to be addressed and will fall under one of three preset priorities:
High
Medium
Low
L - Est. Cost
This is the estimated cost to resolve the issue.
M - Est. Hours
This is the estimated time required to resolve the issue.
[!NOTE] Note:
Estimated cost and hours can be used to help with work planning. The estimated cost and hours for a new visit are the sum of the cost and hours of the issues in that visit.
You can edit any field in the slide-out panel by clicking on it.
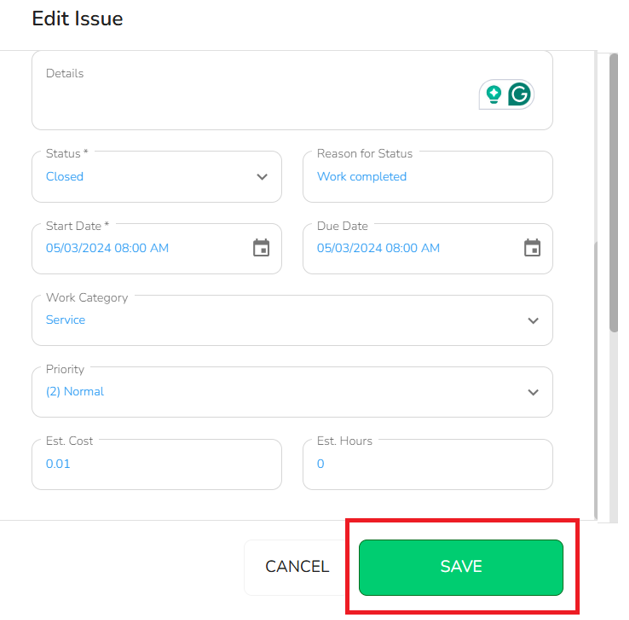
Once you've made all relevant updates the Save button at the bottom of the slide-out will become highlighted.
Click the Save button to save your changes.
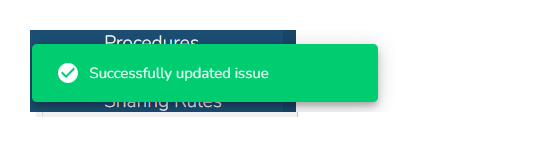
A pop-up notification will appear, confirming that your changes were successfully made.
To ensure the changes are reflected in the system, refresh your screen.
Dispatching from an Issue
With the Dispatch from an Issue feature, you can quickly create a visit from issues.
Steps to Dispatch an Issue
In the Building tab, you will see a list of buildings. Scroll through the list or use the search bar to find the desired building. Click on the building to view its details.
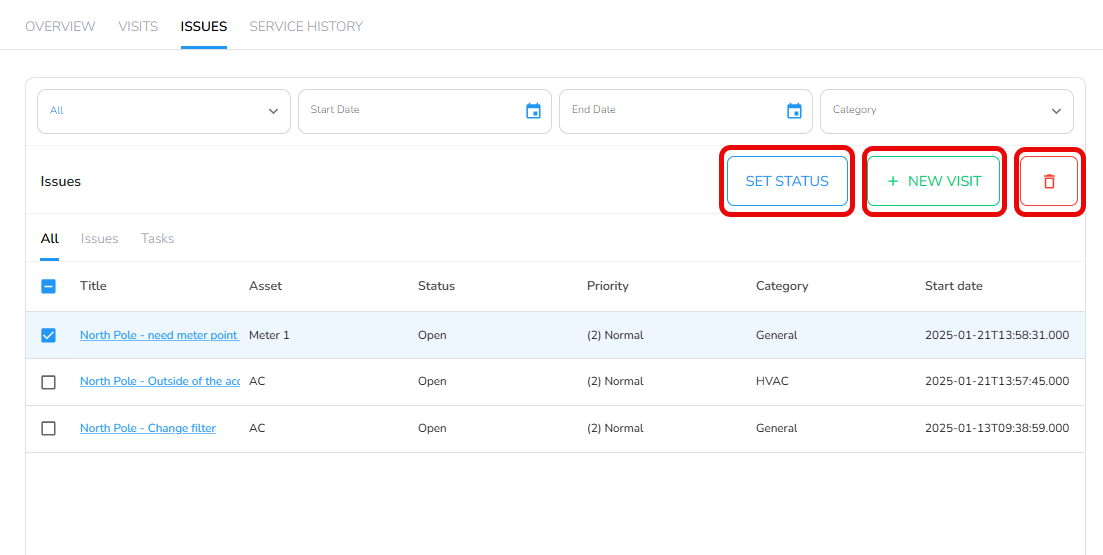
Once inside the building’s Details page, locate the Issues section. Review the list of issues associated with the building. To select the desired issue(s), check the corresponding box(es).
[!NOTE] Note
You may select multiple issues by checking multiple boxes. Each issue will appear as a separate task under the visit.
Once an issue is selected, the ‘Set Status’, ‘+ Add Visit’, and ‘Delete’ buttons will be activated.
[!NOTE] Note
Depending on which tab you are on, some items in the list may not be selectable (the checkbox is disabled).
Only items that are Issues and that are Active can be added to visits.
"Issue" means a work item that's not already in a visit. Once an issue is in a visit it's called a task.
"Active" means the item's status is not Closed or Cancelled.
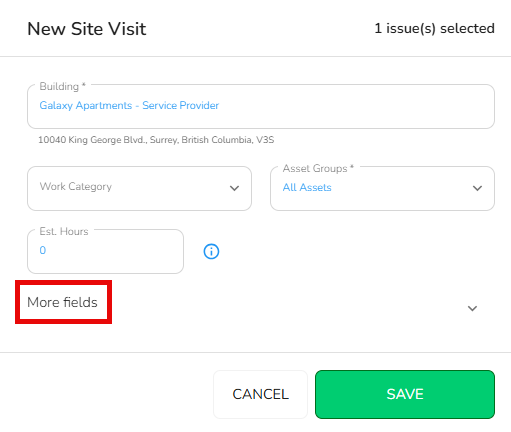
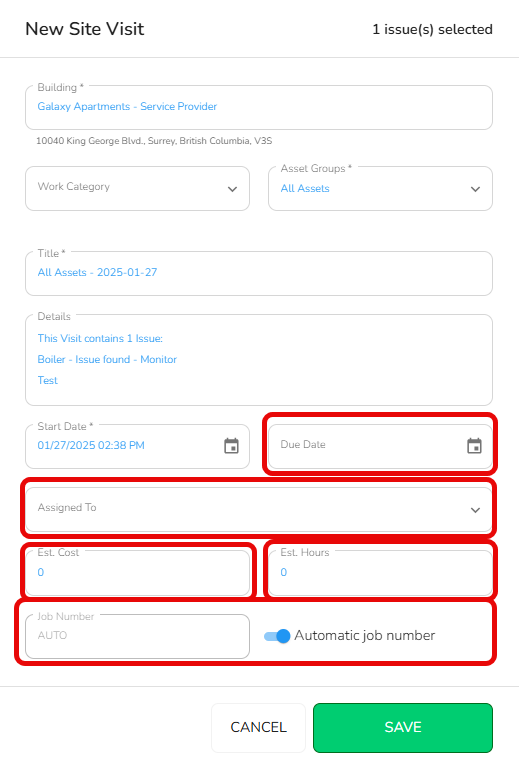
Complete the New Site Visit form. If you want a more detailed form, click the ‘More Fields’ button.
The extended form allows you to add:
A Due Date
An Assignee
Estimated Cost
Estimated Hours
A Job Number (By default, the system automatically assigns a job number. If you want to enter a specific job number, toggle the setting off.)
[!NOTE] Note
Once dispatched, the visit will be accessible in the Service Twin® App. If you do not see it, please refresh your Organization data and it will be available.
Use Case Example:
A building manager notices an HVAC malfunction reported as an issue in BuiltSpace. During a routine inspection, a technician identifies HVAC issues and logs them into the system using the Service Twin® App.
The issue then appears on the Admin Portal, where the manager can directly dispatch issues as visits by selecting the Issues and clicking the +Add Visit button. This action opens the New Site Visit dialog box, which requires details about the service request. The manager fills out the form, ensuring all necessary information is included.
[!NOTE] Note
If a specific technician is needed, they can select that person in theAssigned tofield.
Once completed, the manager saves the data. The service request is then automatically dispatched to the technician via the Service Twin® App, ensuring quick action, accurate documentation, and a streamlined resolution process.
How to get Notified about changes
To receive notifications about changes to Issues or Visits, create a Notification Rule.
This is where the building definition goes.
An Asset is an item that serves a function in/around a building.
In BuiltSpace, assets must be associated with a building, although they may physically exist outside of a building or be movable.