How to add Time Entries
Last updated
How to Add Time Entries
This guide provides a detailed walk-through on adding time entries in the Admin Portal, which helps in tracking and managing work hours efficiently. Follow these steps to accurately record time details for various jobs performed.
[!NOTE]
Note:Technicians can enter their Time Entries into the Admin Portal.
Step 1: Access the Time Entries Tab
- Log into the Admin Portal: Start by logging into your Admin Portal with your credentials.
- Navigate to Time Entries: On the left side of the dashboard, locate and click on the ‘Time Entries’ tab.
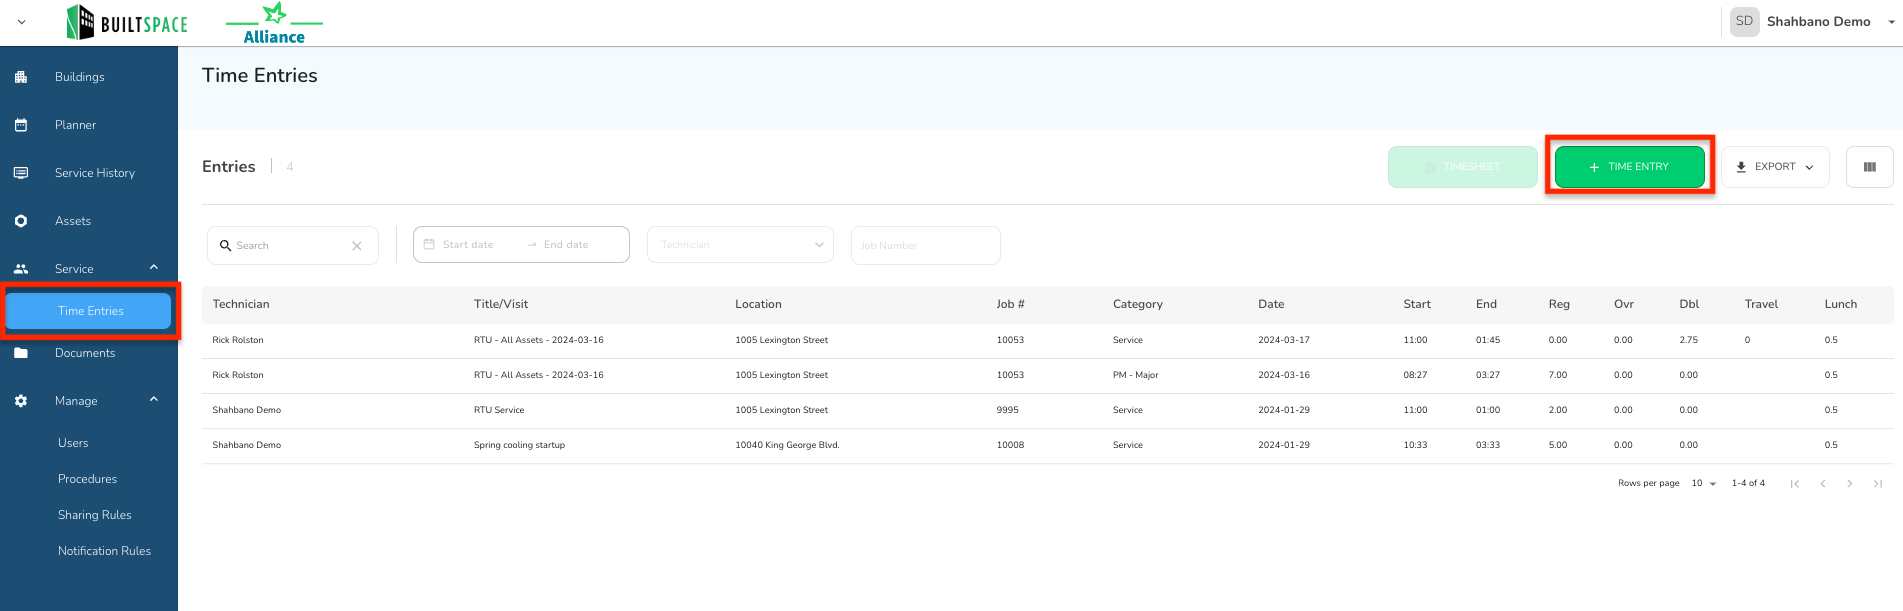
Step 2: Initiate Time Entry Addition
- Click on the +Time Entry Button: To add a new time entry, click on the ‘+Time Entry’ button.
Step 3: Fill Out the Time Entry Form
A slide-out form will appear on the screen. You will need to fill out several fields categorized into four sections:
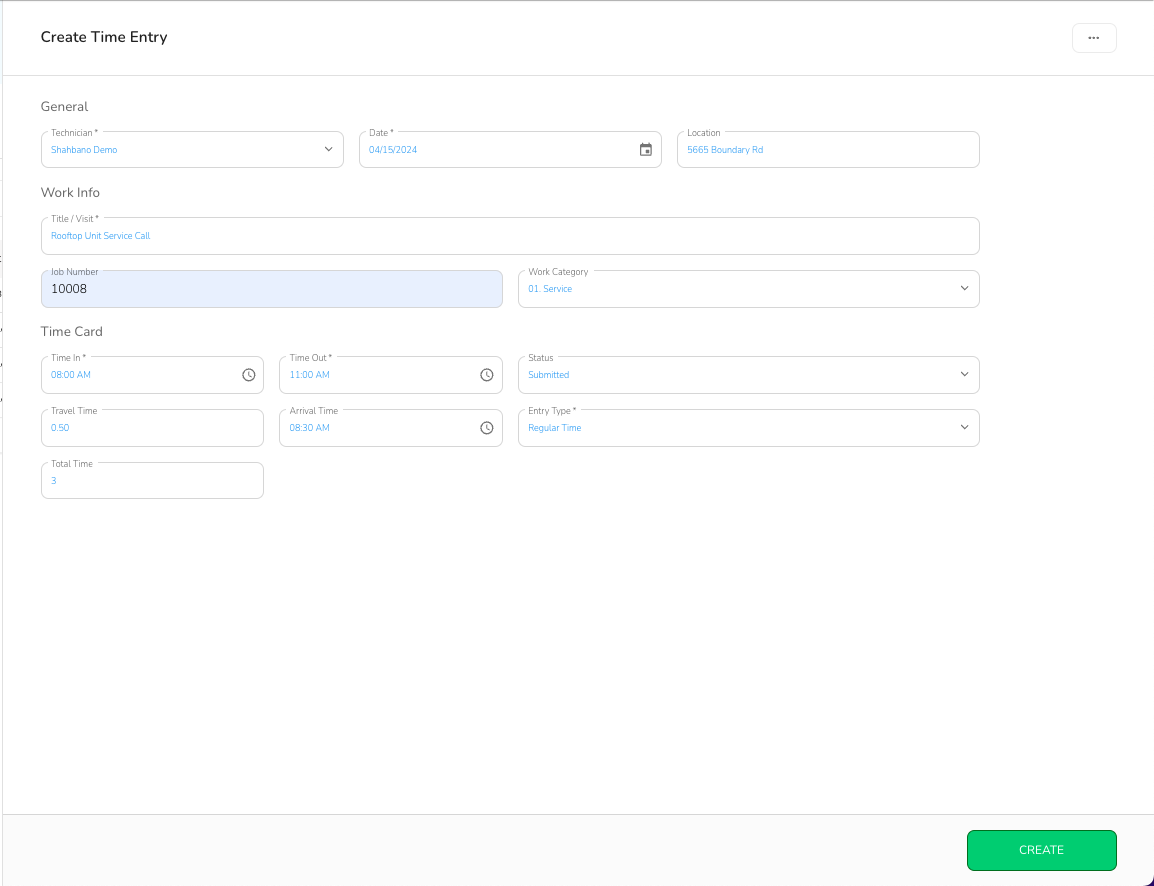
General Information
- Technician Name: Enter the name of the technician for whom the time entry is being recorded.
- Date: Specify the date when the work was performed.
- Location: Provide the address where the work was carried out.
Work Information
- Title/Visit: Write a brief description of the work performed.
- Job Number: Enter the job number associated with the work.
- Work Category: Select the type of work performed from the drop-down menu.
Time Card Details
- Time In: Enter the time when the technician started travelling to the work location.
- Time Out: Enter the time when the work was completed.
- Arrival Time: Specify when the technician arrived at the work location.
- Travel Time: This field is automatically calculated based on the travel in and arrival times.
- Entry Type: Choose the type of hours worked (e.g., Regular, Overtime, Double Time).
- Total Time: This is automatically calculated based on the Time In and Time Out entries.
Step 4: Create the Time Entry
- Review the Information: Before creating the entry, review all the details for accuracy.
- Click Create: Once you have verified the information, click the ‘Create’ button to finalize the time entry.
Completion
- Confirmation Notification: After clicking ‘Create’, you will receive a notification confirming that the time entry has been successfully added to the system.
- View and Manage Entries: You can now view and manage, including editing this and other time entries within the Time Entries tab.