Assets Overview
Last updated
The Assets Overview screen provides tools to help you manage assets more efficiently. This article highlights key features available in the Admin Portal for organizing, relocating, and updating your asset data.
Key Features on the Assets Overview
1. Move Assets Feature
The Move Assets feature allows you to select and transfer multiple assets at once. Whether you're reorganizing or relocating assets across buildings, this tool simplifies the process—no need for manual workarounds.
- Comprehensive Data Transfer
All related data moves with the asset, including:
- Components (and sub-components)
- Tasks
- Issues
- QR codes
- Inspections
This ensures the asset remains fully functional in its new context.
Tips for best results
- Parent assets: If you select a parent asset, its components are automatically included—no need to select them separately.
- Asset hierarchy: The asset’s parent is not moved. This may split the hierarchy across two buildings.
- Visits and tasks: Visits are not moved. If tasks belong to a Visit, the Visit remains in the original building while the tasks are moved. You’ll see the Visit title in the task details, but not in the Visit itself.
Note:
- The tool cannot move assets with more than 1,000 related records (e.g. inspections, tasks, or components). For large legacy assets, please contact BuiltSpace support.
- Moving assets does not update the “Modified” timestamp of the associated data.
- This feature is not currently integrated with Notifications, but integration is planned for a future release.
How to Move Assets
Moving assets is a two-step process. First, select the parent assets you want to move, then click the "Move to Building" button.
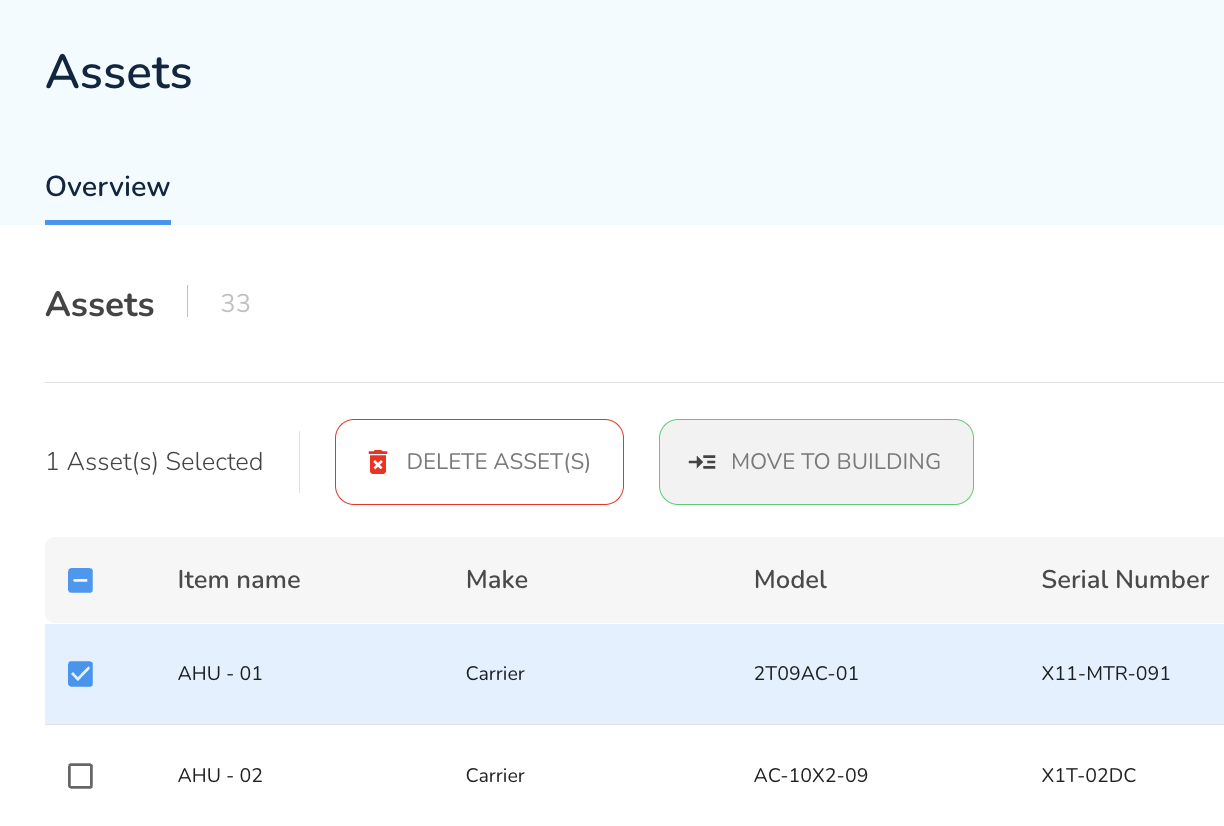
A dialog will appear showing the related data that will move.
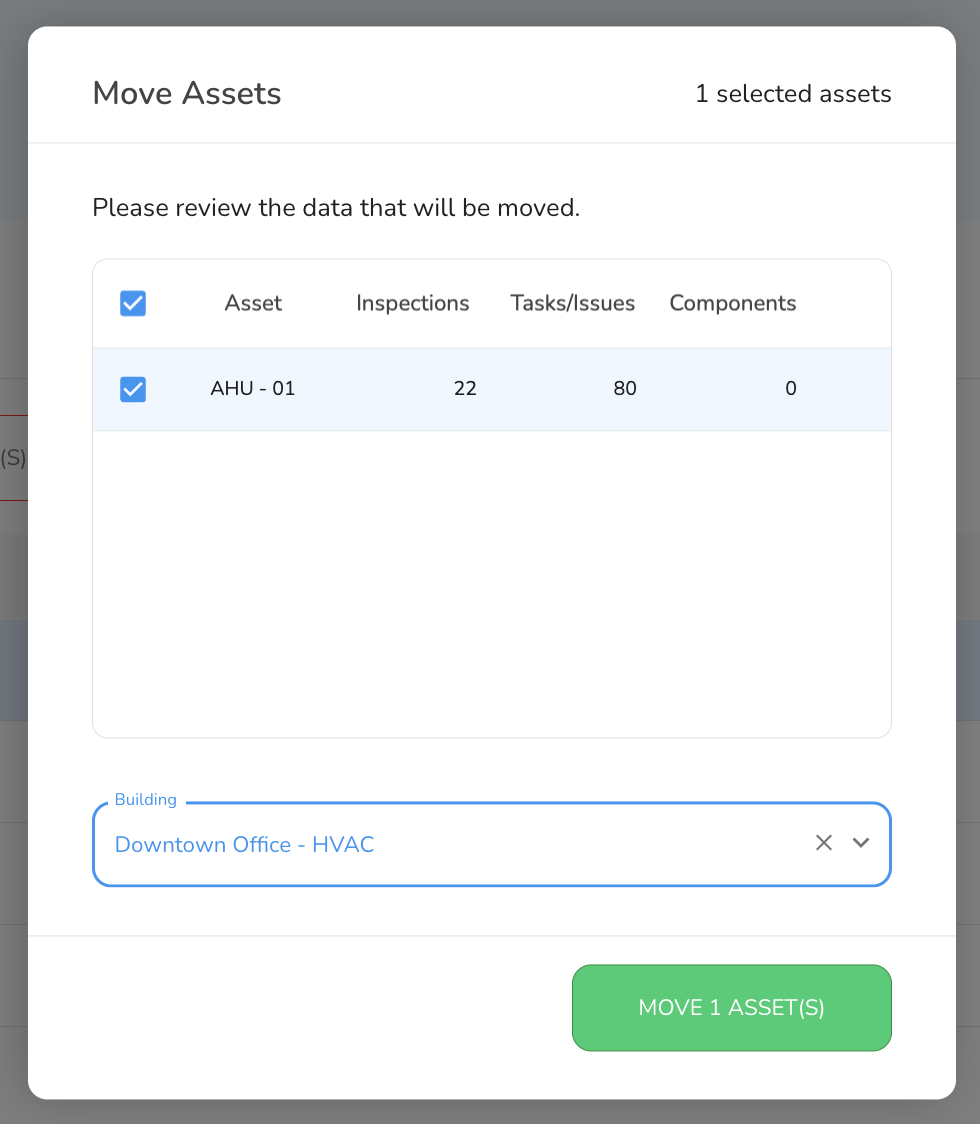
Next select the target building and click "Move Asset(s)".
2. Bulk "Set Status" Functionality
With this feature, you can execute bulk "Set Status" actions. This means you can easily change the status of multiple assets at once. For instance, marking dozens of assets as "Inactive" at the conclusion of a construction project is a breeze. This feature simplifies the management of assets in various scenarios.
3. Add/Remove Assets in Asset Groups
With this feature, you can easily add or remove assets in new or existing asset groups. Follow these steps to manage your asset groups:
- To Add an Asset to an Asset Group, select the Asset(s):
- Click on the checkbox next to the asset(s) you want to add or move.
- Click "Add to Another Group":
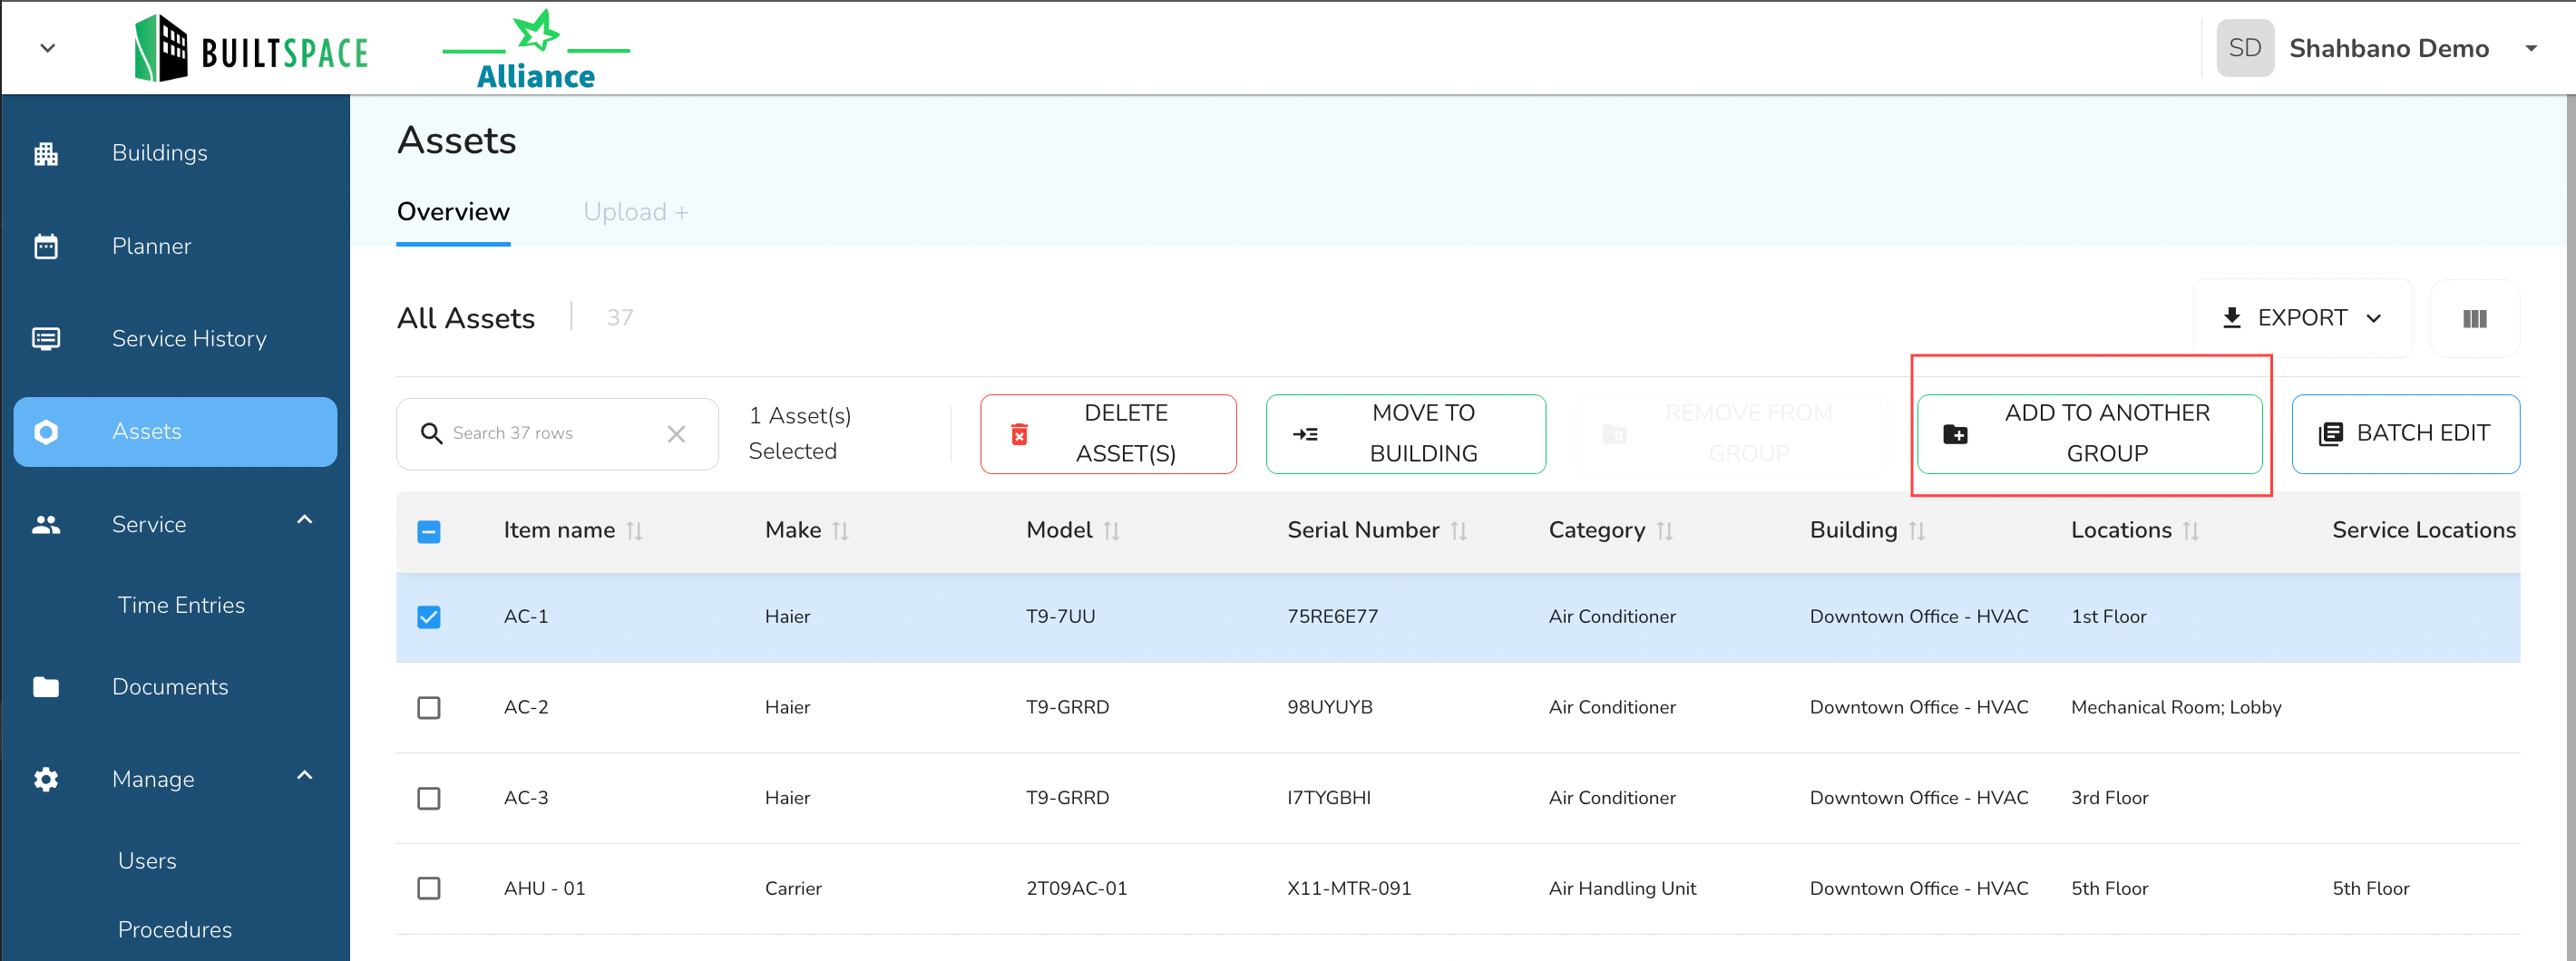
- After selecting the asset(s), click on the "Add to Another Group" button.
- Choose or Create an Asset Group:
- A pop-up window will appear.
- To add the asset(s) to a new group:
- Click on the "New Group" button.
- Enter a name and any required details to create the new asset group.
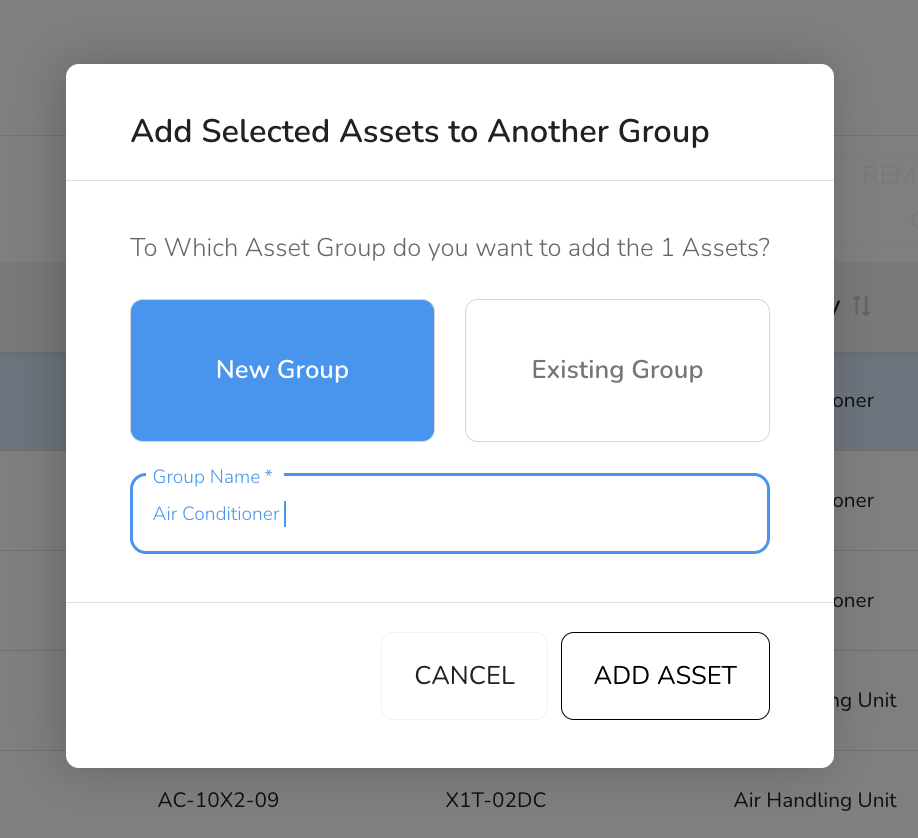
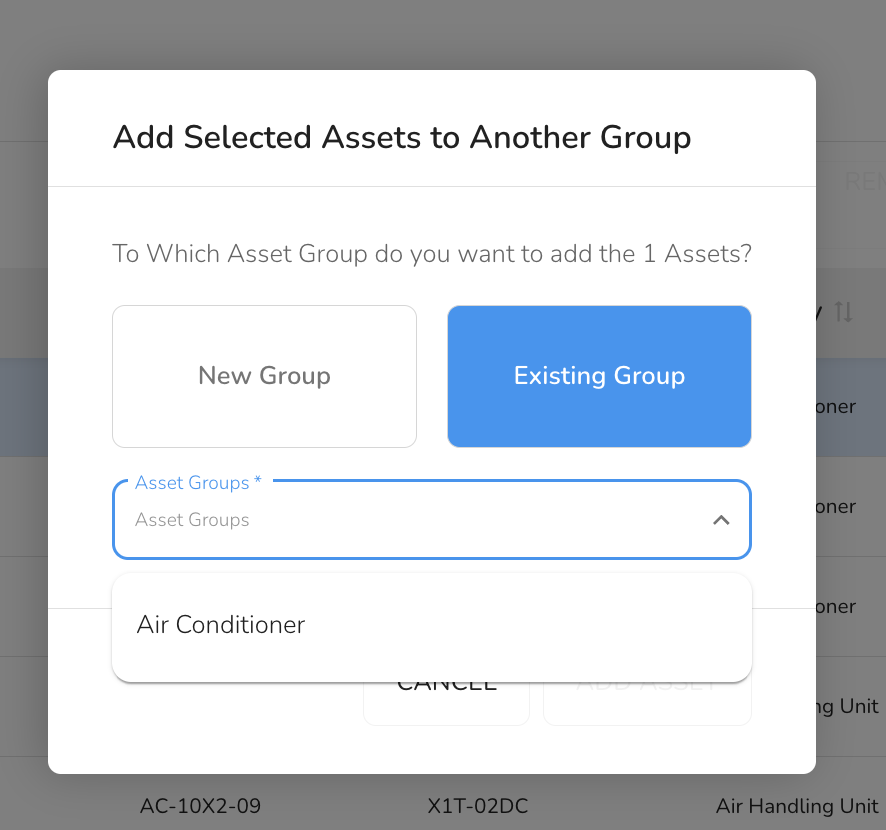
- To move the asset(s) to an existing group:
- Select the desired group from the dropdown menu.
[!NOTE]
Note:Assets can belong to multiple asset groups simultaneously. Adding an asset to a new group does not remove it from any of its existing groups.
- Confirm the Addition:
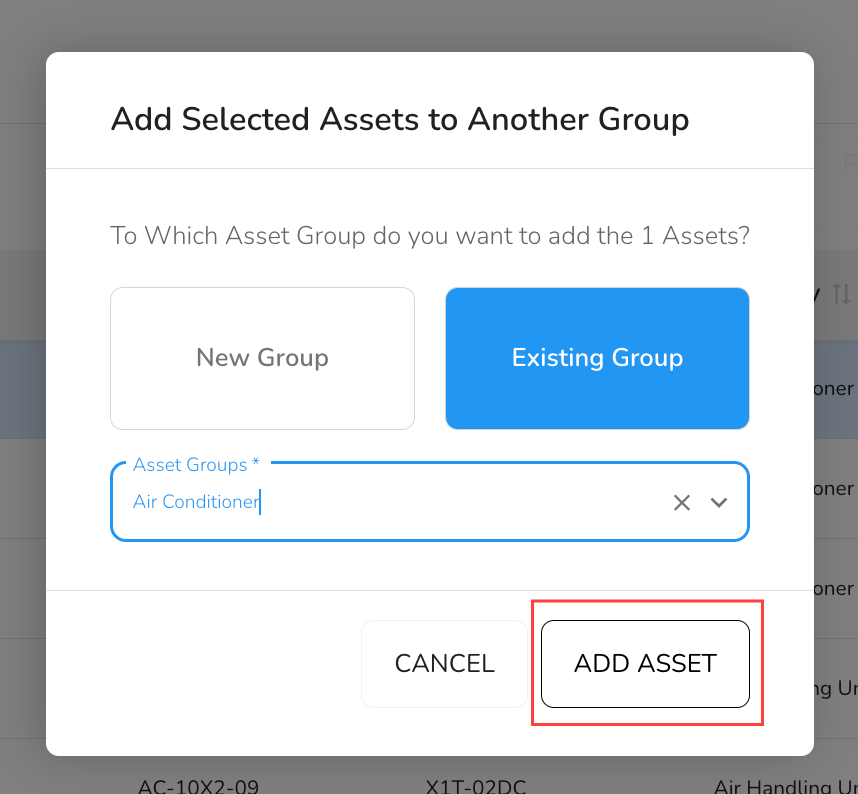
- Click on the "Add Asset" button to finalize the process.
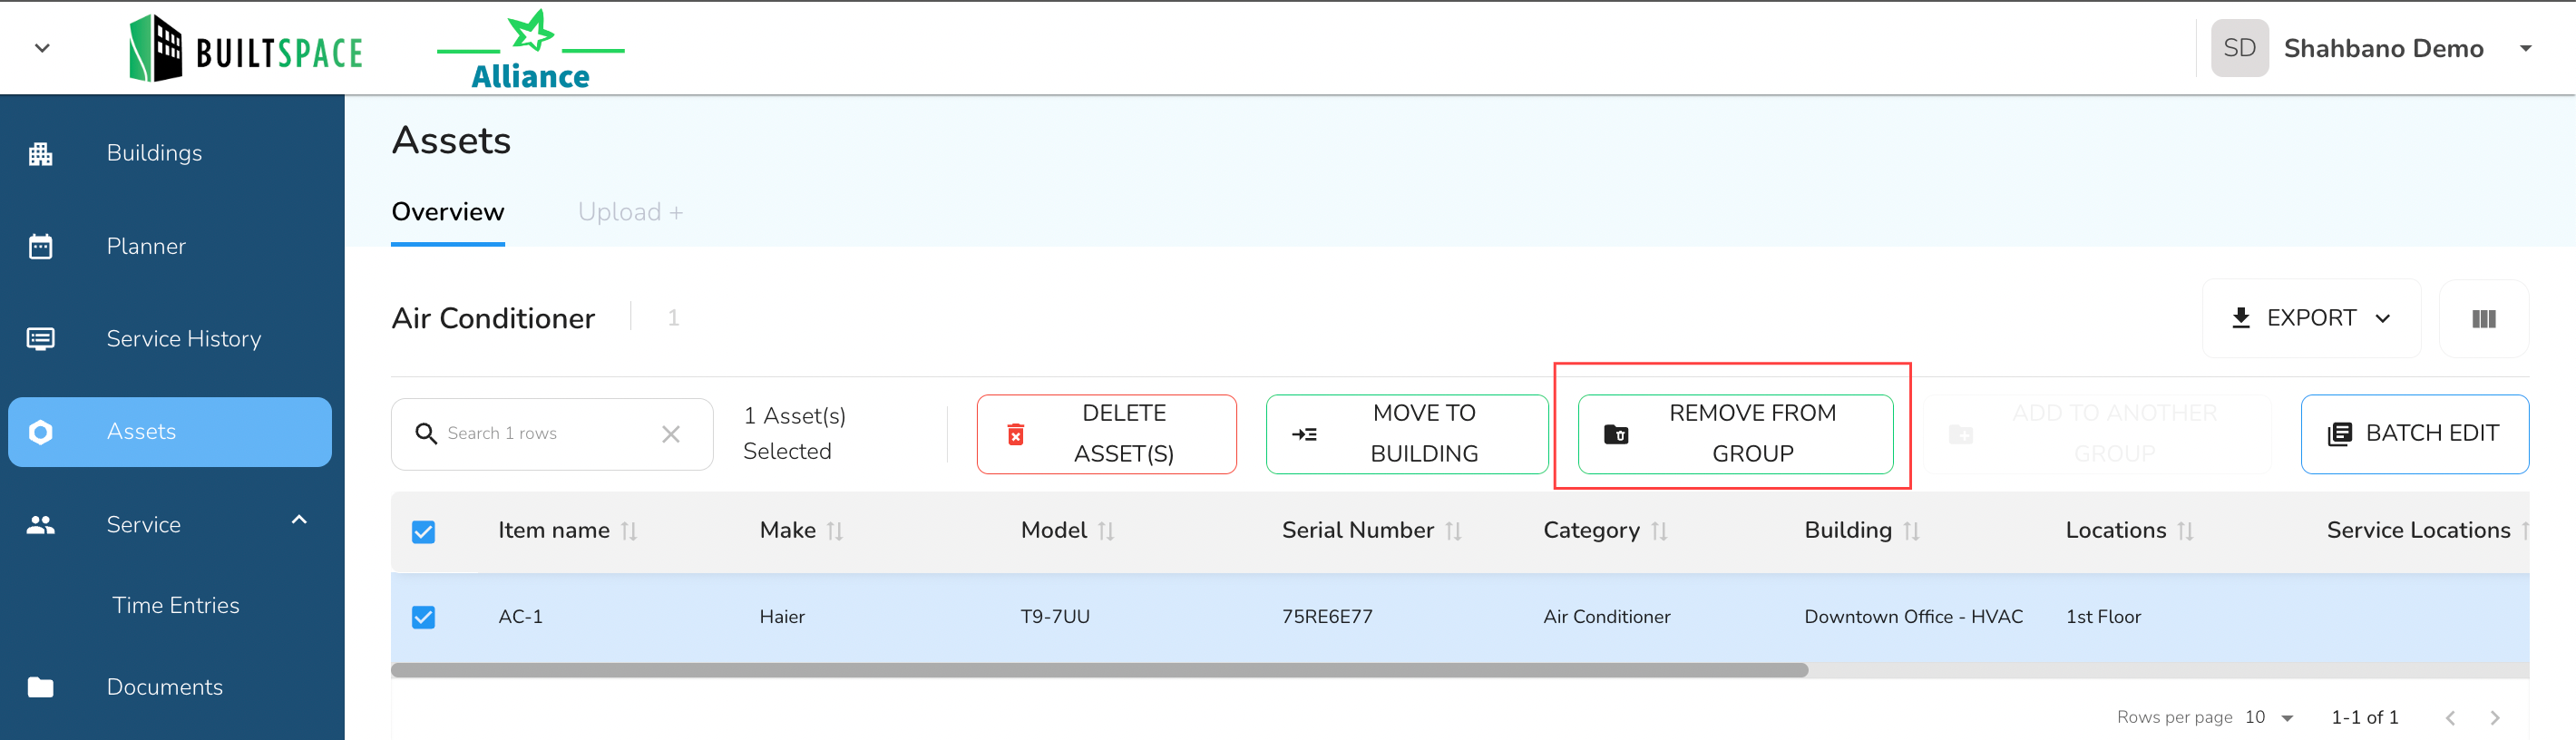
- To Remove from an Asset Group
[!WARNING]
Note:Please note that you cannot manually add or remove assets from Automatic groups. These groups are defined by criteria such as building group, building, or asset category, rather than by a specific list of assets.
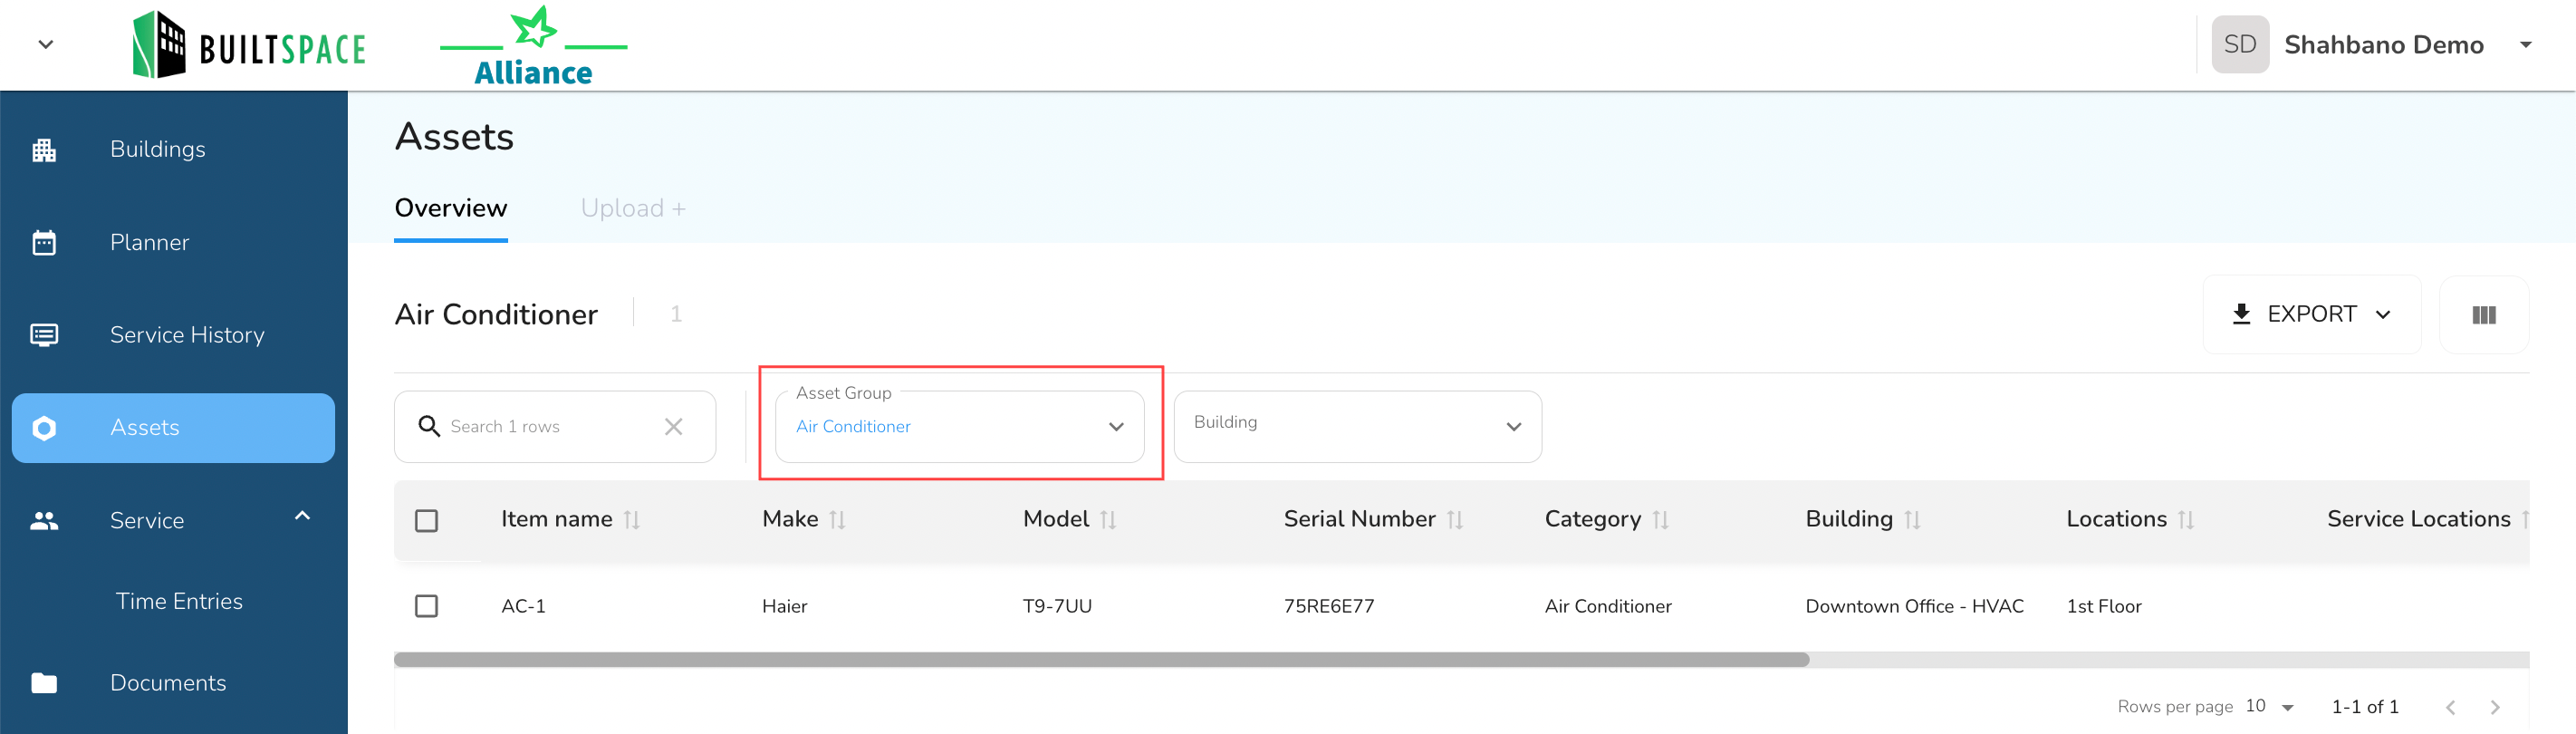
- Select the Asset Group from which you want to remove assets.
- Click on the checkbox next to the asset(s) you want to remove and click “Remove from Group”.
4. Asset View/Properties
The Assets Overview screen now includes a filter to:
- QR Code Mapping – Displays a list of assets with their corresponding QR codes. This helps you quickly locate and confirm the correct QR code for a particular asset.
- Recently Added – Shows assets that were most recently added to the system, making it easy to track and review new asset entries.
- Property Group – When you select a Property Group, the table will update to show a column for each asset property within that group. Only properties with existing values will be shown—empty columns are automatically excluded. This view helps you compare property-specific data across assets and supports deeper inspection or validation of asset records.
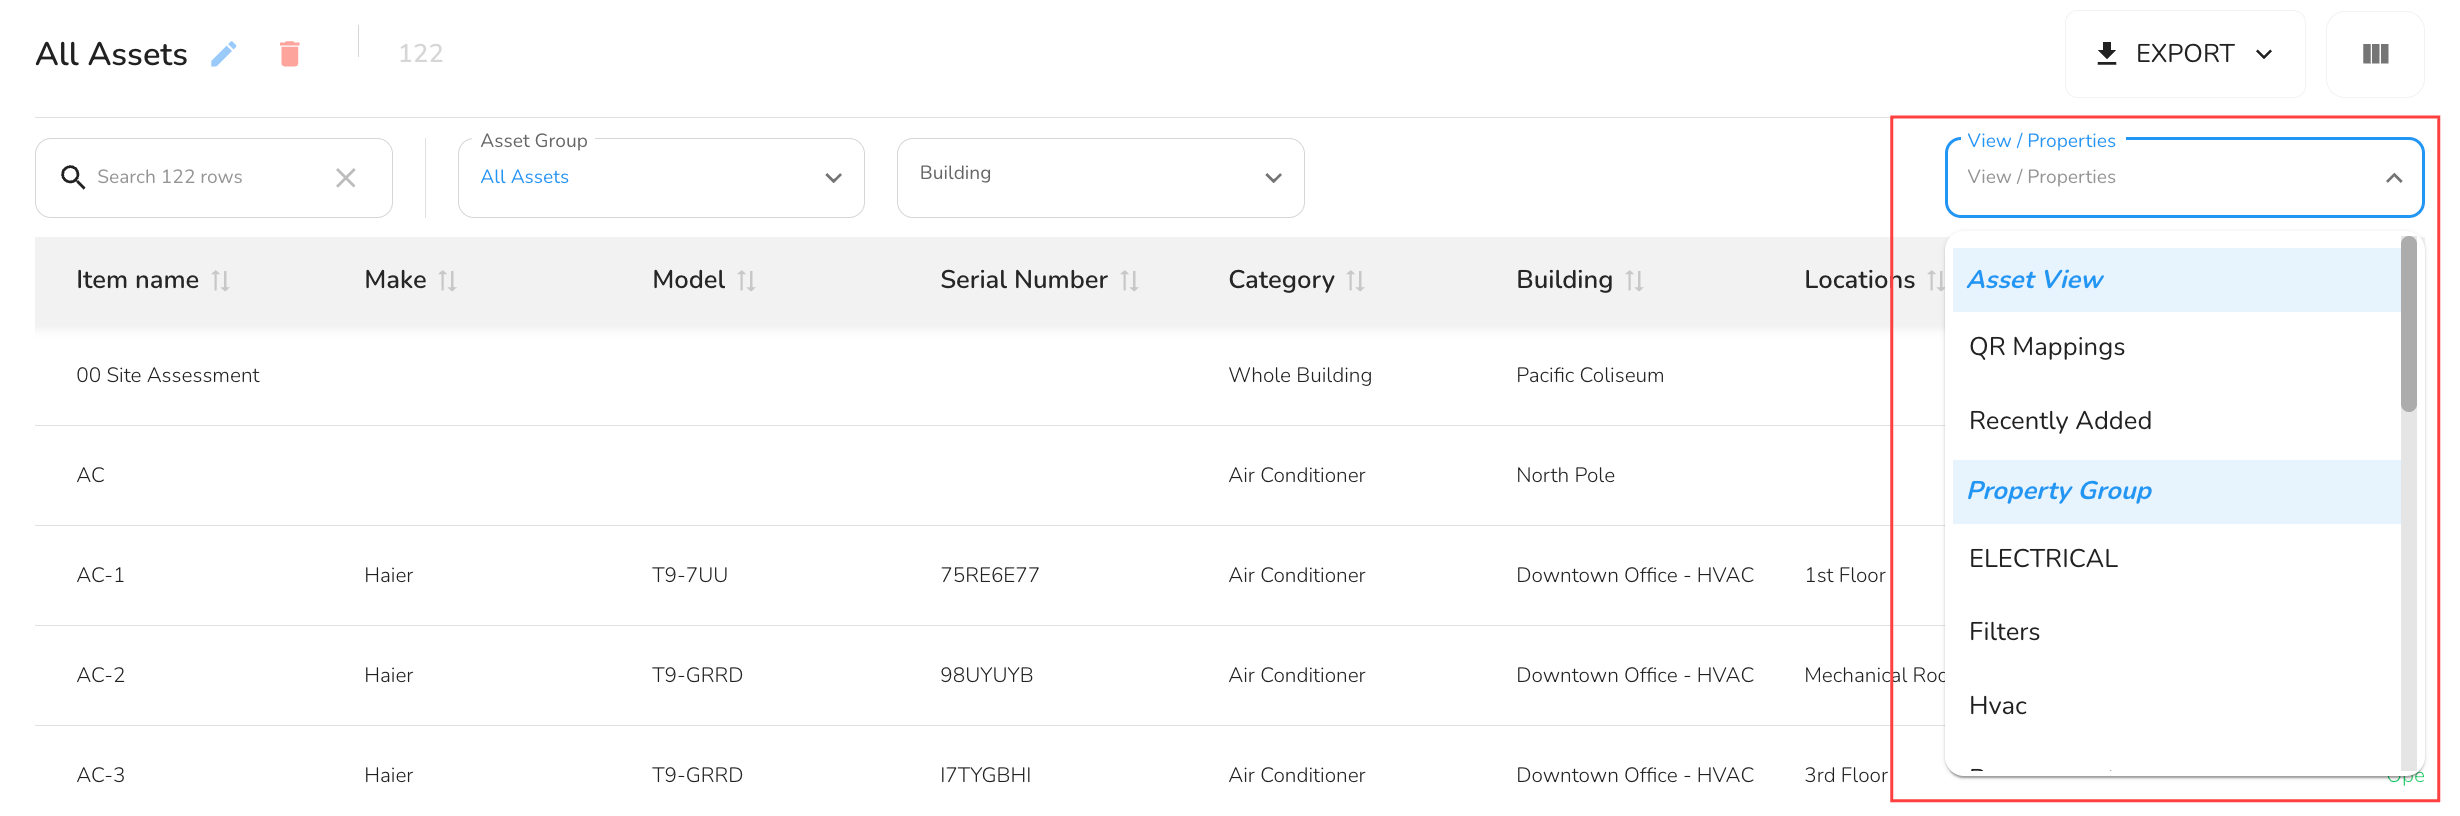
These views help you quickly assess new assets or find QR code ID’s for assets.
The features available in the Assets Overview screen—Move Assets, Bulk Set Status, and Asset Group Management—offer powerful tools for organizing and maintaining your asset data. By streamlining common actions, they help you work faster and more accurately across large projects.