Asset Upload (Video Walkthrough)
Last updated
Adding Multiple Assets: A Step-by-Step Guide
[!NOTE]
Note:If you would like to upload multiple Assets at once, the only way to do so is from the Admin Portal.
To efficiently manage and incorporate multiple assets into your system at once, it's crucial to follow a structured process. This guide will walk you through the necessary steps to prepare and upload asset information using Microsoft Excel or a similar tool for organizing tabular data. For those who prefer a more direct approach, you can start from Step 6 to input data directly into the Asset Upload form.
Step-by-Step Instructions
Step 1: Download the Asset Import Template
- Begin by downloading the Asset Import Template. This template is specifically designed to ensure your data is correctly formatted for import.
Step 2: Open the Template
- Open the downloaded Asset Import Template. The link provided in Step 1 will direct you to the template file.
Step 3: Organize Asset Information
- With the template open, organize your asset information according to the predefined column names. Please pay special attention to columns marked with a red asterisk (*), as these are required fields. Below is a brief overview of the key columns and formatting tips:
- You can enter up to a maximum of 1000 rows per worksheet.
- You can also add extra worksheets, with different columns. The first three columns must be the same: Building Name*, Asset Name*, Category*.
- Building Name: The name of the building where the asset is located. The building must be already added on the BuildSpace platform. Please visit How to add a Building for more information.
- Asset Name: We recommend you use the format "Asset ##", where "##" represents a sequential number (e.g., RTU 01, RTU 02). Each asset name must be unique within a building.
- Asset Category: Refer to the Excel template for the correct formatting and spelling. Please pick an asset category from the dropdown that best matches your asset. The Asset Category must match an existing category on the BuiltSpace platform.
- Parent Asset: You may find it helpful to organize your assets into a hierarchy by system or by zone. If you provide a parent value, it must match the name of another asset in the same worksheet and with the same Building Name.
Step 4: Navigate to the Assets Page
- Access the Assets page on your Admin Portal to proceed with the upload process.
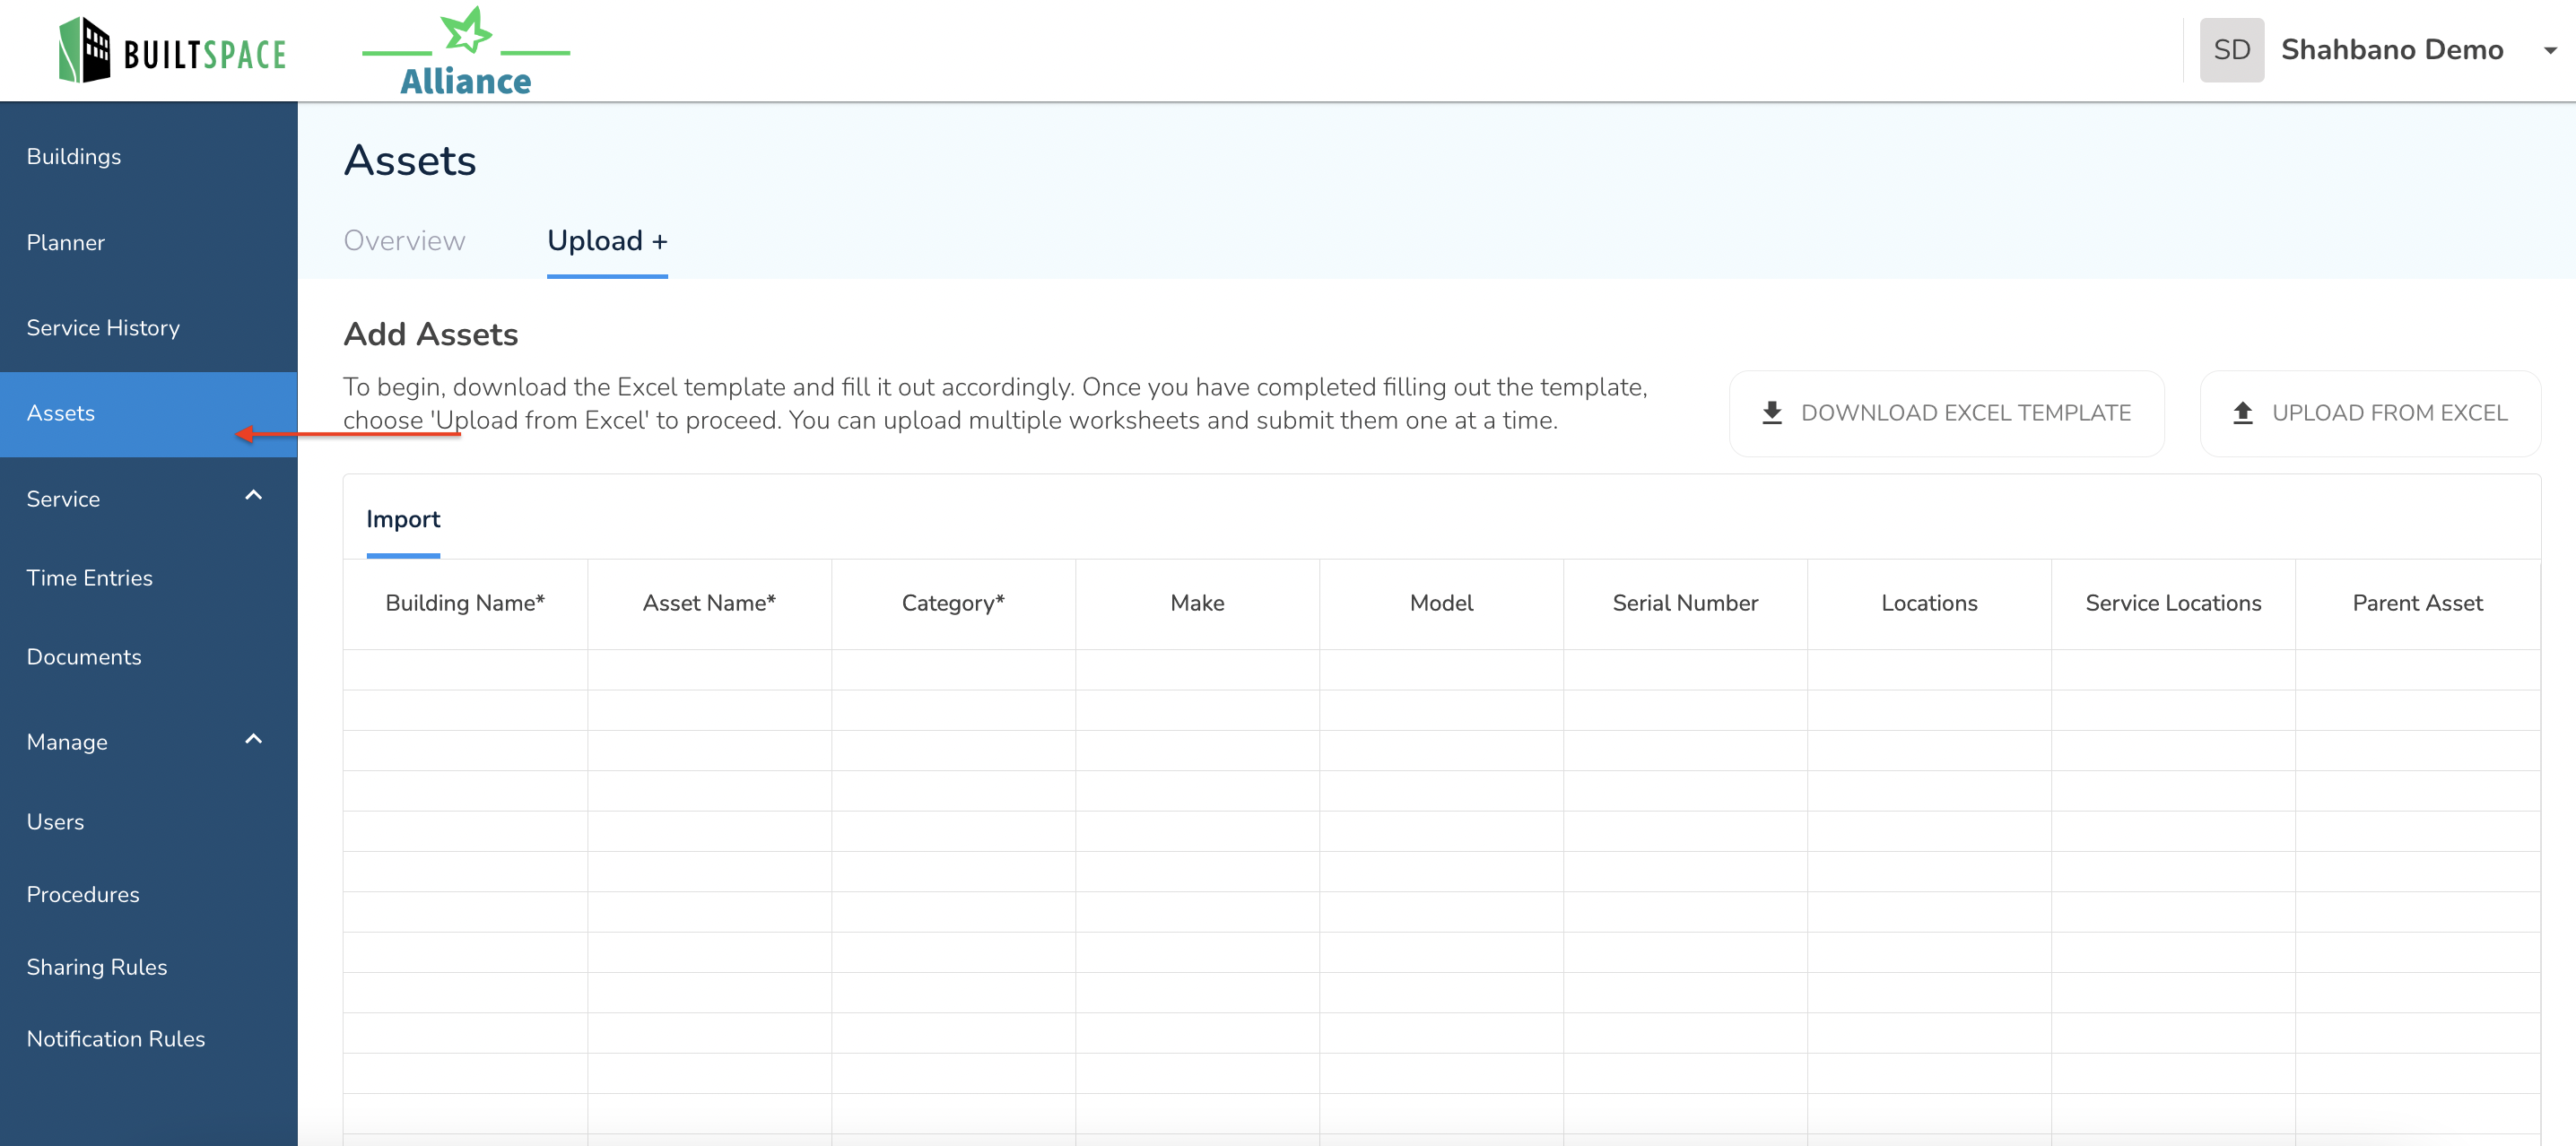
Step 5: Initiate Asset Addition
- Click on "UPLOAD FROM EXCEL" located in the top-right corner of the Assets page to start adding new asset information. Select the Excel Template file that you would like to upload.
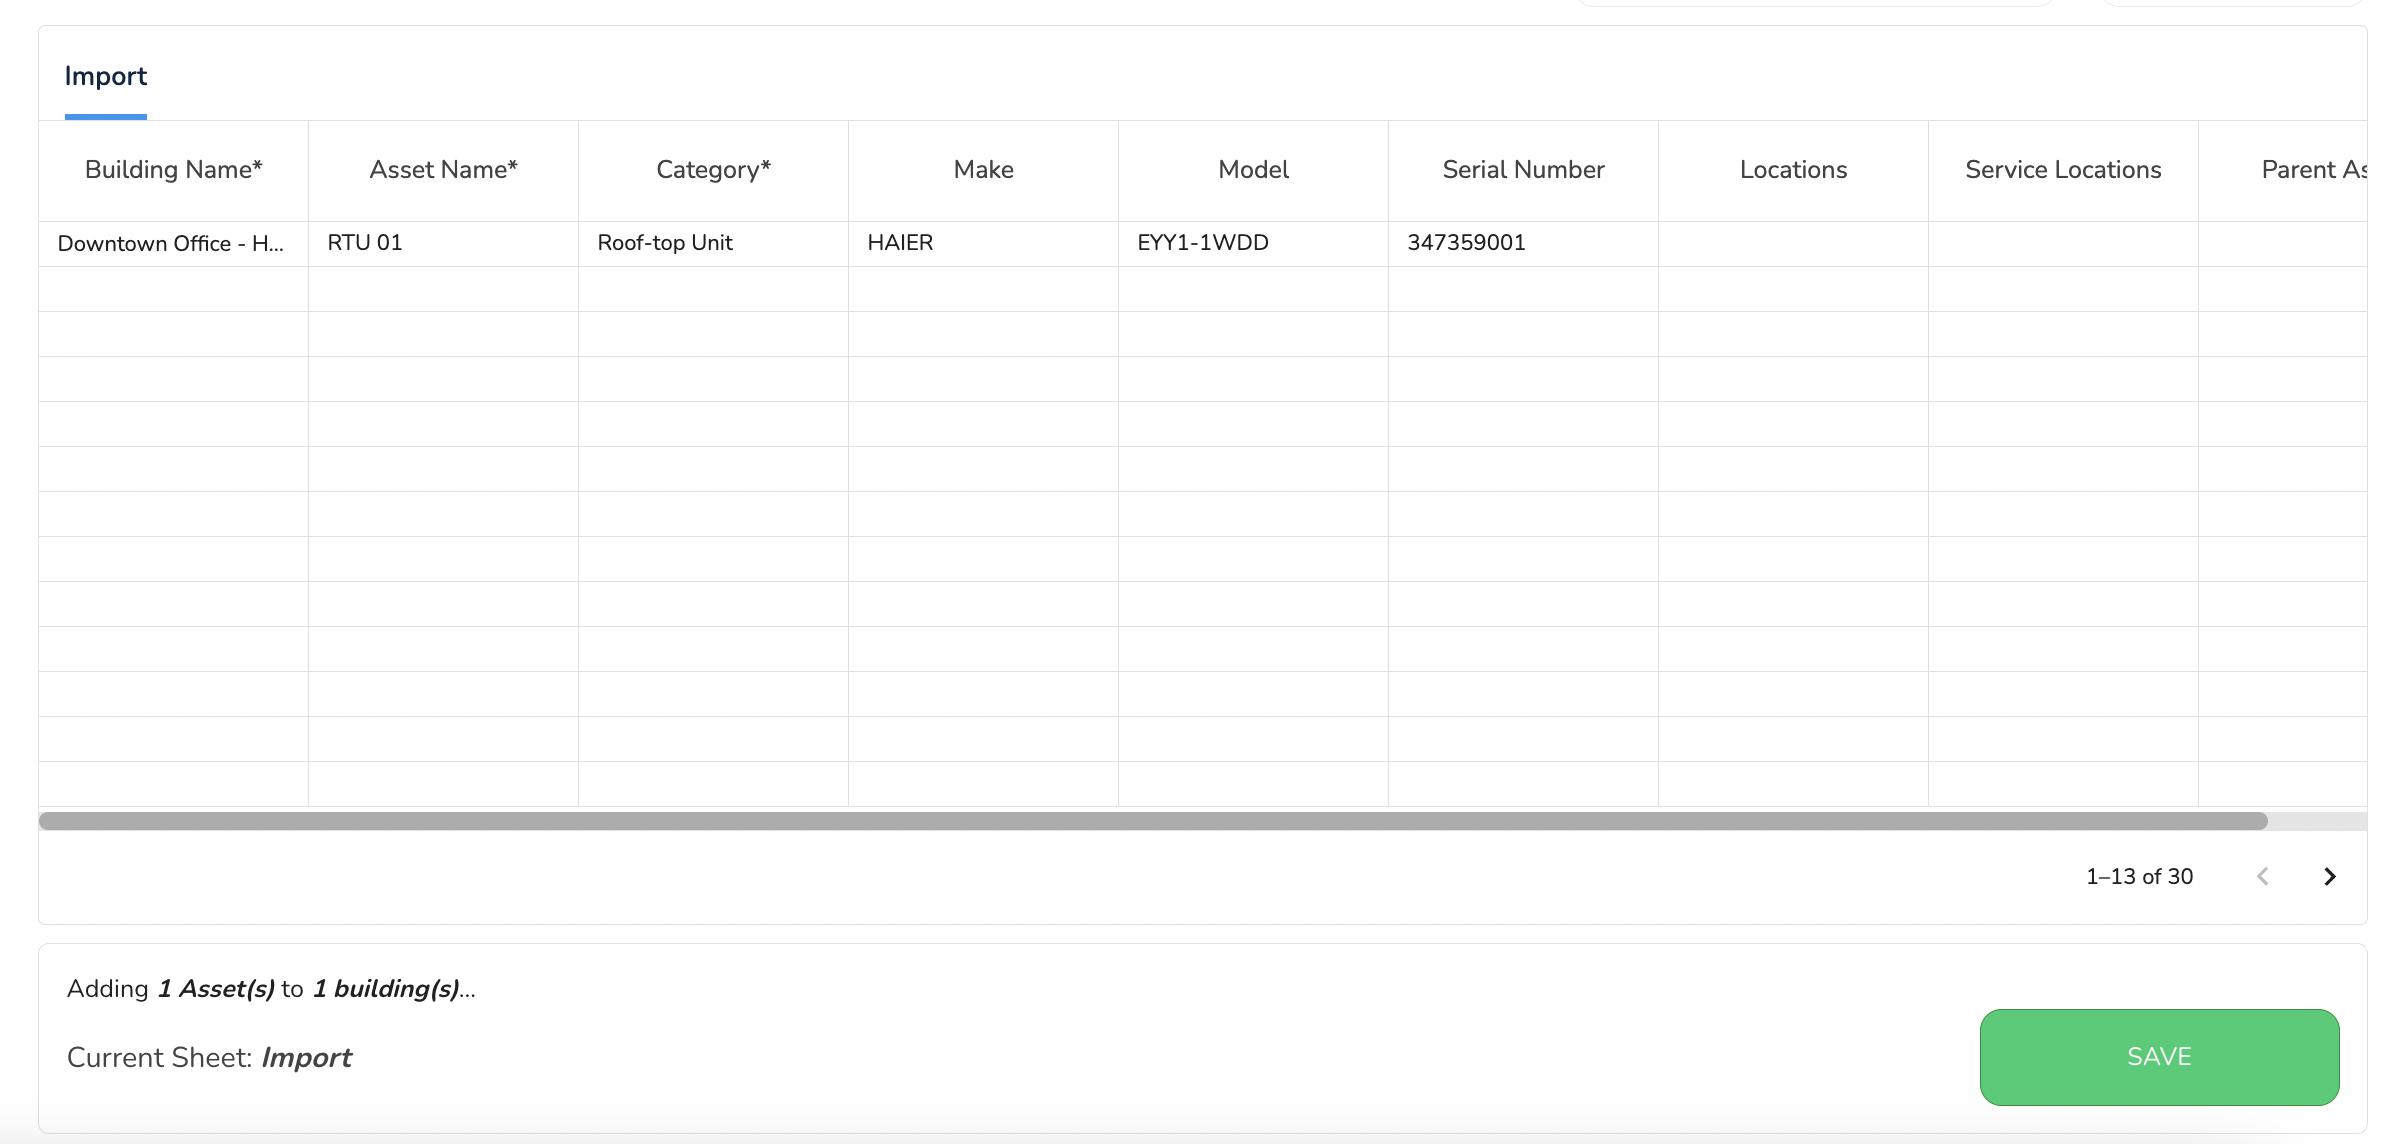
Step 6: Submit the Information
- Once all asset information is uploaded into the Import sheet, navigate to the bottom of the window and click "SAVE" to finalize the import process.
[!WARNING]
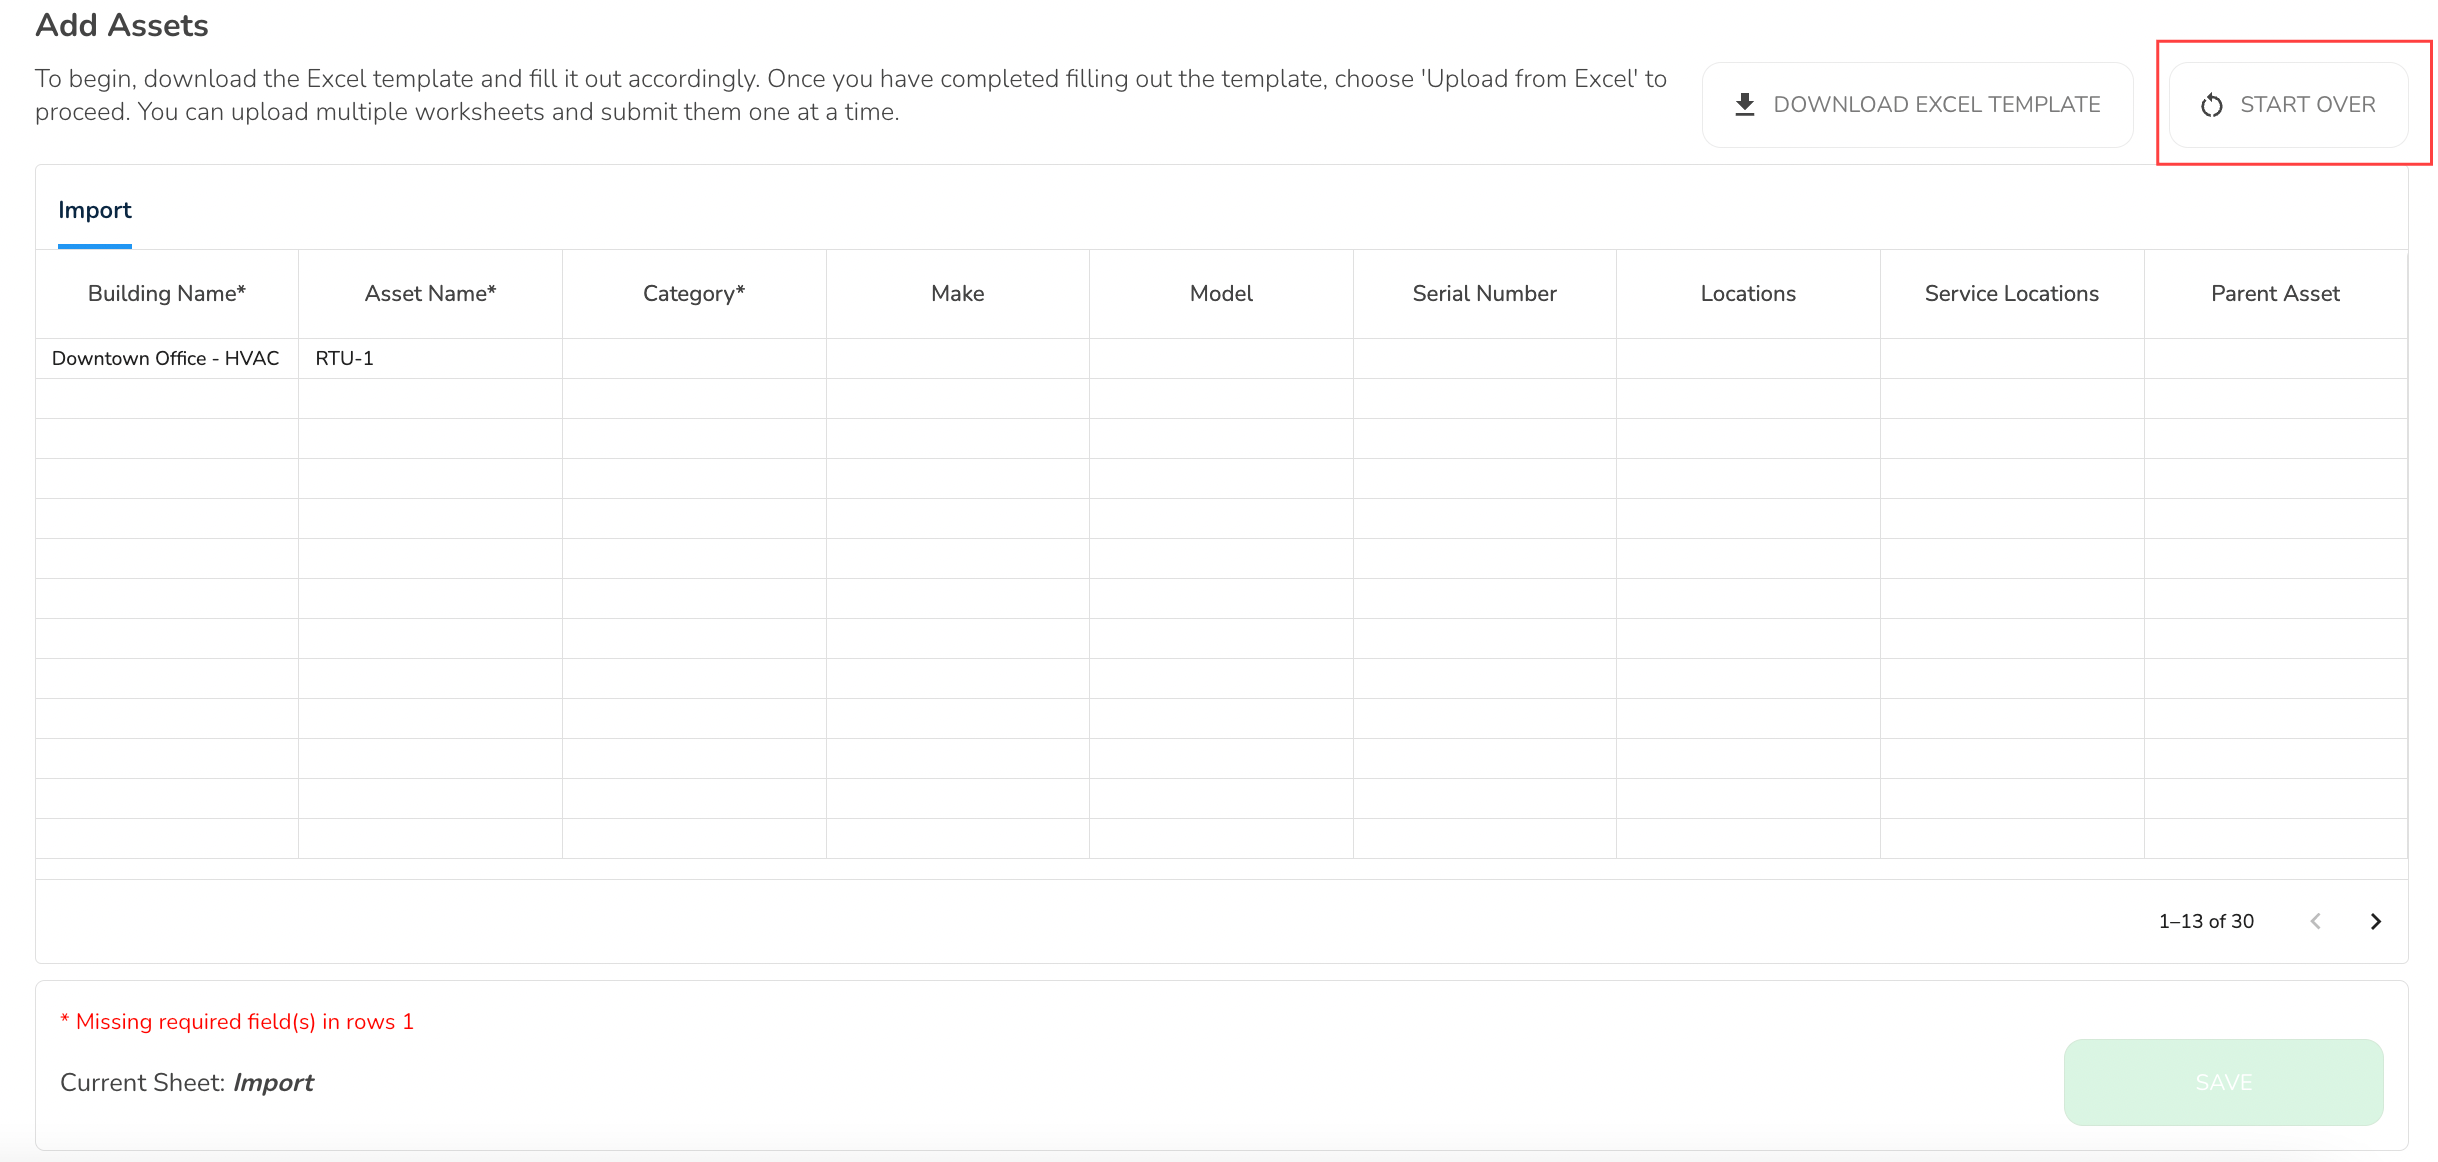
Note:Validation errors will show up in the box at the bottom. If the Building or Category is wrong then the dropdown will be blank and "required fields will be missing."
It would be best practice to edit the data in Excel and re-upload it by using the “START OVER” button.
Step 7: Confirmation of Asset Creation
- The system will begin processing and a confirmation notification will be sent to you once all assets have been successfully created and added to the system.